In This Article:
- FAQs
Kitchen CUT allows users with the appropriate permissions to transfer stock between outlets using two methods: requisitions and transfers.
Requisitions vs. Transfers
Before transferring stock, it’s important to understand the difference between the two available methods:
-
Requisitions:
Used to request stock from another outlet. The outlet supplying the stock must then approve and action the requisition. You can read more about Requisitions HERE. -
Transfers:
Used to immediately move stock from one outlet to another without requiring approval.
Both functions result in the movement of stock between outlets but follow different processes depending on the desired workflow and approval requirements.
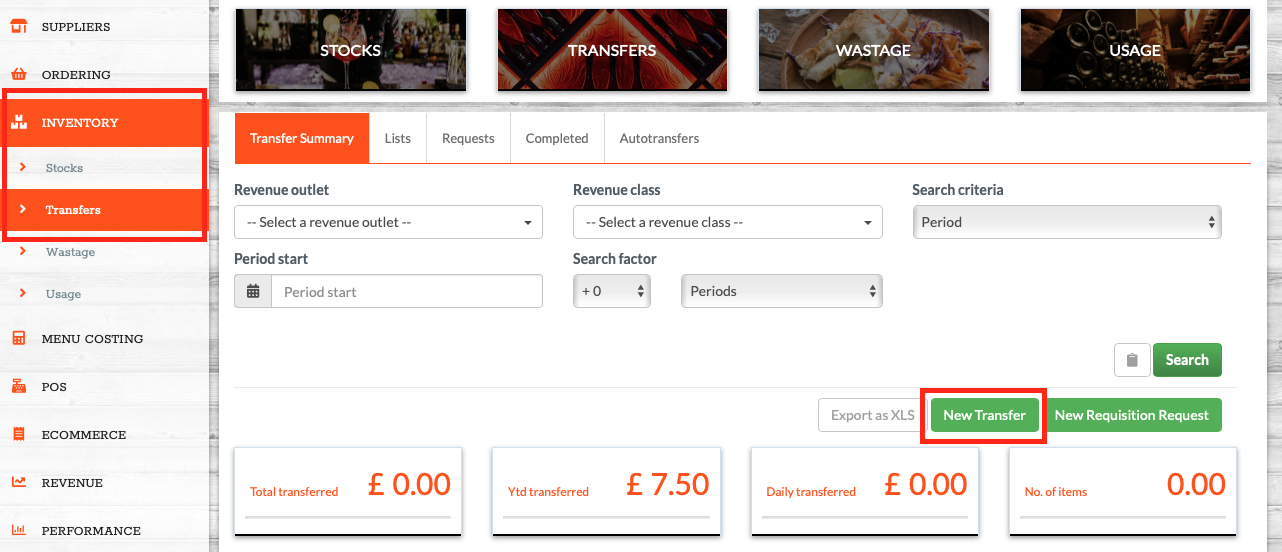
✅ How to Transfer Stock
-
Go to:
Inventory > Transfers -
Select New Transfer.
-
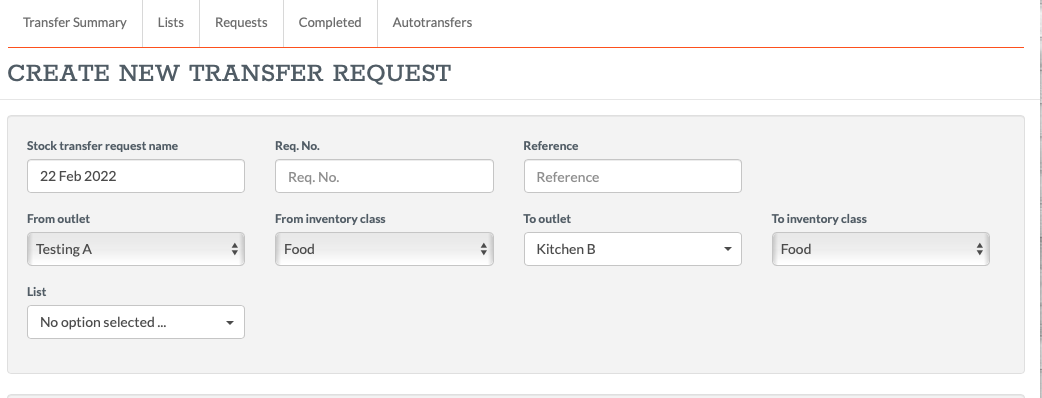
Complete the transfer form:
-
From/To Outlet – Select the outlet you are transferring stock to and from.
-
From/To Class – Select the Inventory class you want to transfer stock to and from.
-
Name – Name your record, we recommend that this be the date of transfer.
-
Reference – (Optional) Add an internal note for tracking.
-
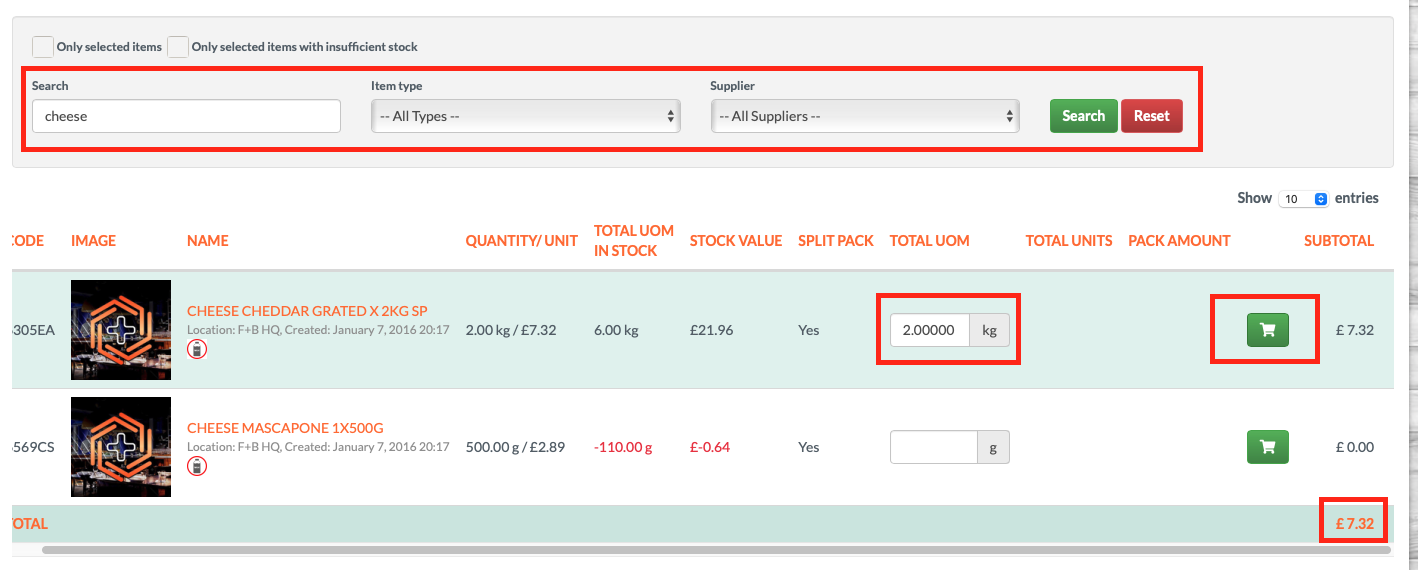
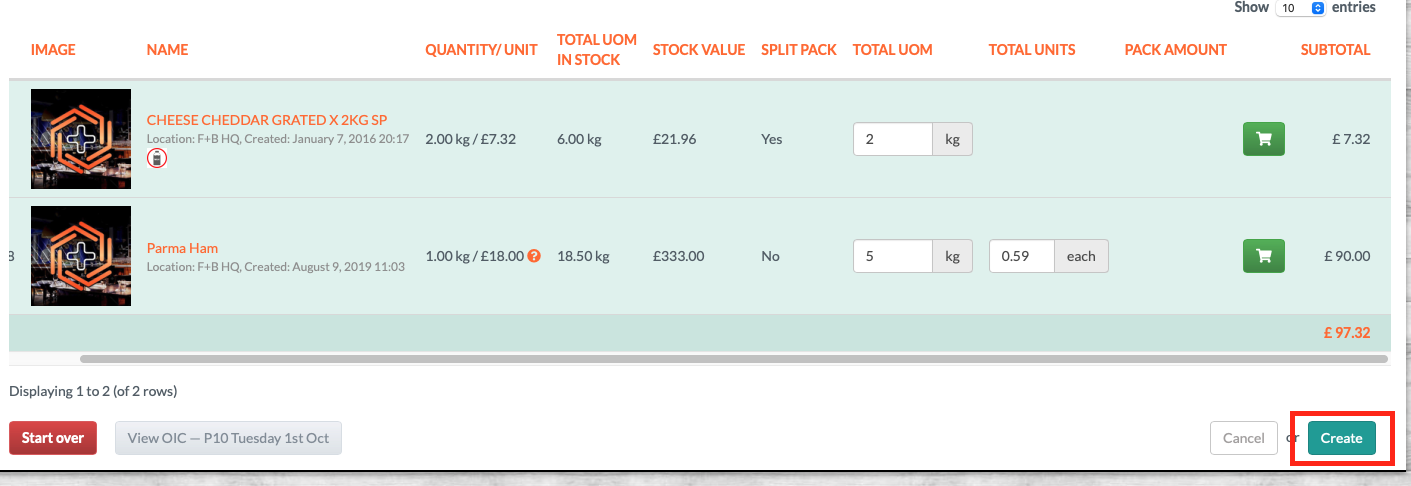
- Add the required products, clicking the green trolley to add to the record.
-
Search for products by name or use filters.
-
Enter the quantity for each item.
-
- Review the products included in your transfer record by applying the 'only selected items' checkbox.
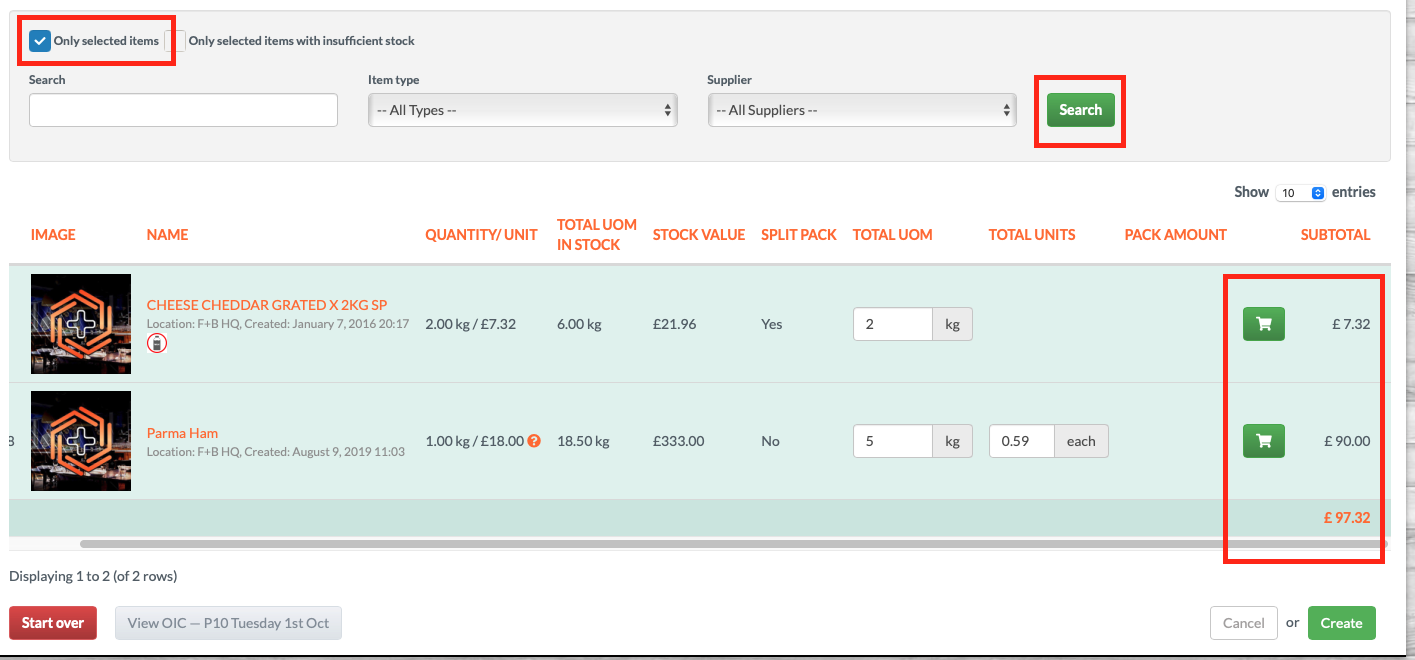
- Click Create at the bottom of the page to finalise the transfer
Settings & Configuration
- If the 'Auto confirm stock transfers' setting (Settings > Inventory > Preferences) is set to 'Yes' the transfer will be processed automatically, immediately depleting the stock in the FROM inventory, and depositing it into the TO inventory.
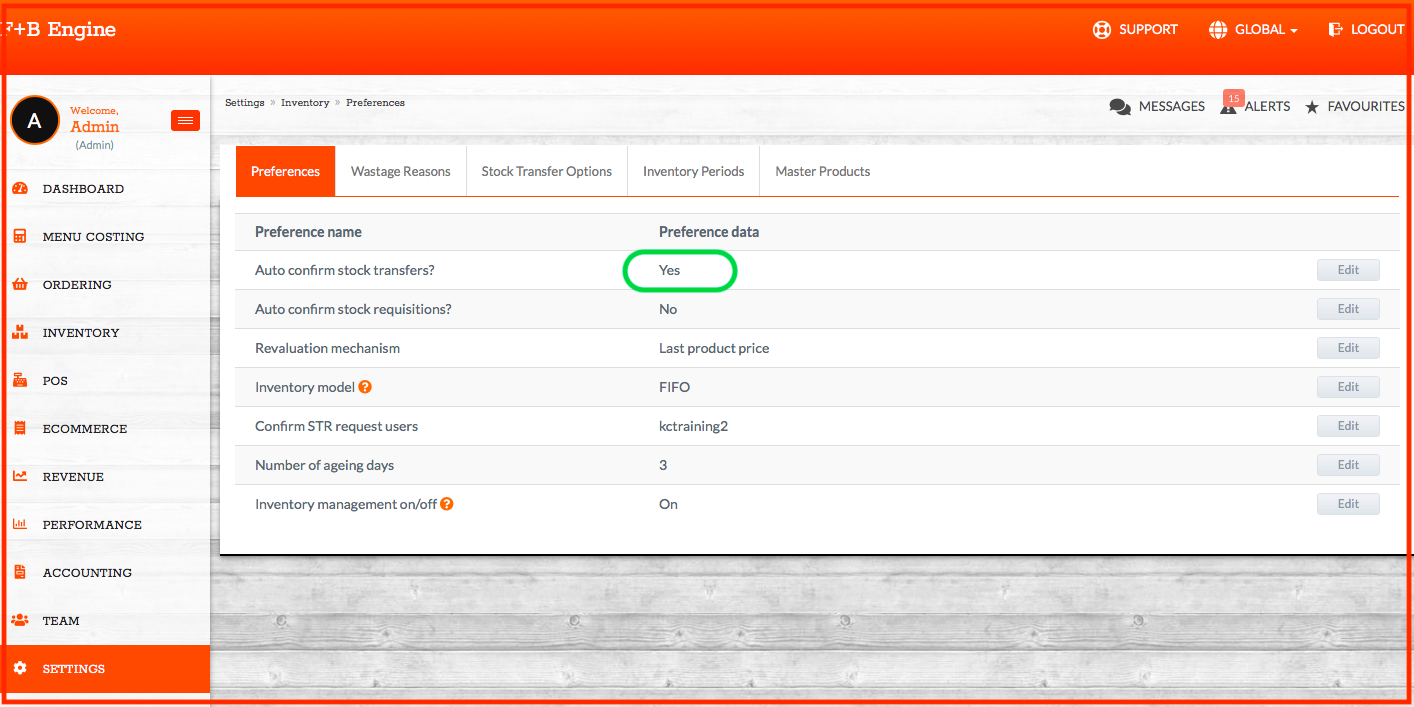
- If set to 'No', the outlet receiving the stock will have to accept first.
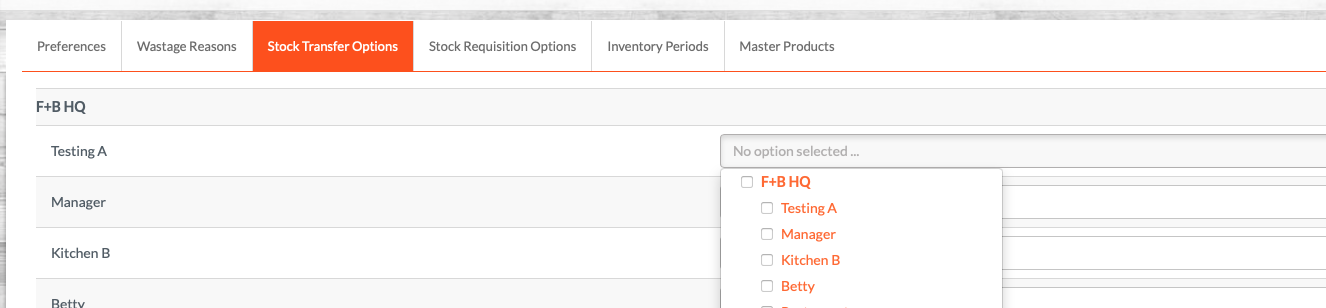
- You will need to ensure you apply the Stock Transfer Options setting (Settings > Inventory > Stock Transfer Options). This is where you enable where each Outlet can Transfer to.
🧠 Best Practices
-
Make sure the From and To outlets are correct to avoid incorrect stock movements.
-
Only users with the correct permissions will be able to access and complete stock transfers.
-
Use the Reference field to include helpful notes for auditing or tracking purposes.
❓FAQs
Do I need permissions to transfer stock?
Yes — users must have appropriate stock control permissions to access and use the Transfers feature.
What happens if I make a mistake on a transfer?
Transfers cannot be edited once created. You will need to create another transfer to adjust stock accordingly.
Can I transfer stock using requisitions instead?
Yes — requisitions allow you to request stock from another outlet, which must then be accepted and processed by the supplying outlet.
💬 Need Help?
✉️ Email us: support@kitchencut.com
📝 Submit a ticket: Submit a ticket