This article walks suppliers through the process of creating and assigning a custom price list to their customers via the Kitchen CUT Gateway. This allows for tailored pricing per client, and ensures product pricing is accurately reflected in the customer's system.
Creating and Allocating a Price List
Step 1 – Create the Price List
-
Log in to your Gateway account
-
Go to
Price lists > Create new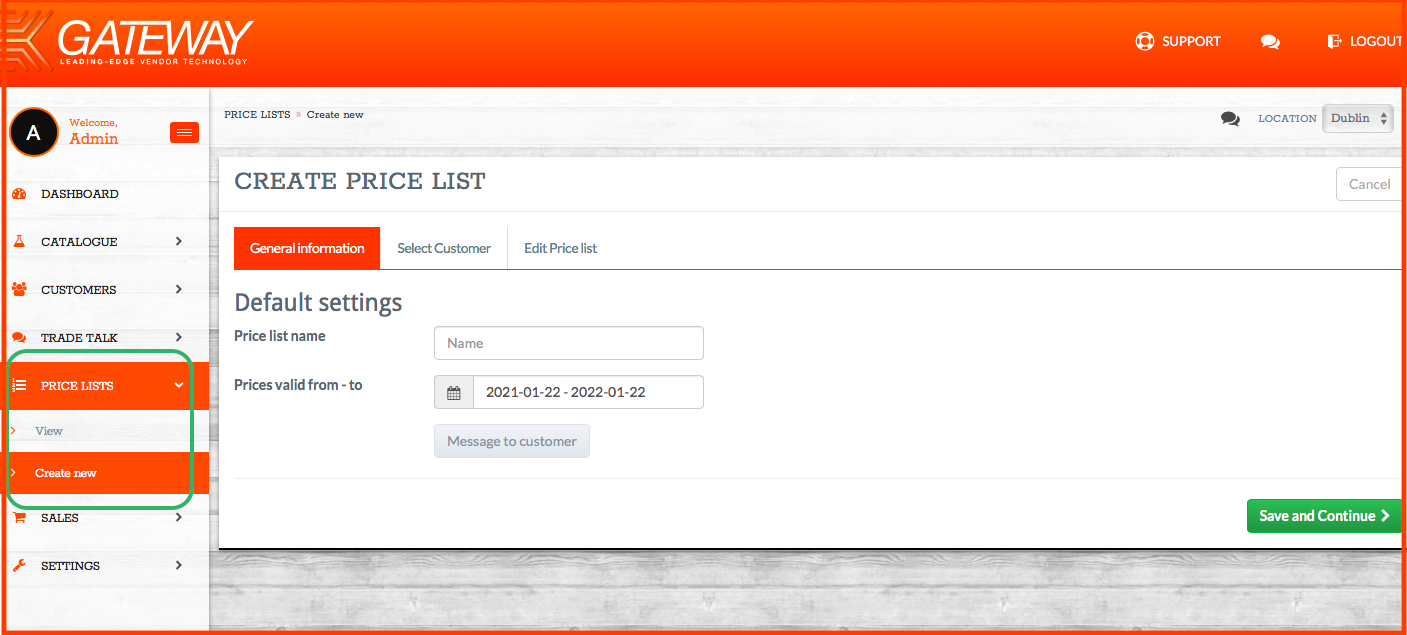
-
Enter a price list name
-
Set an expiration date
Note: This date will be overridden when a new file is submitted, so we recommend setting it a year into the future to avoid early expiry.
-
Click Save and Continue
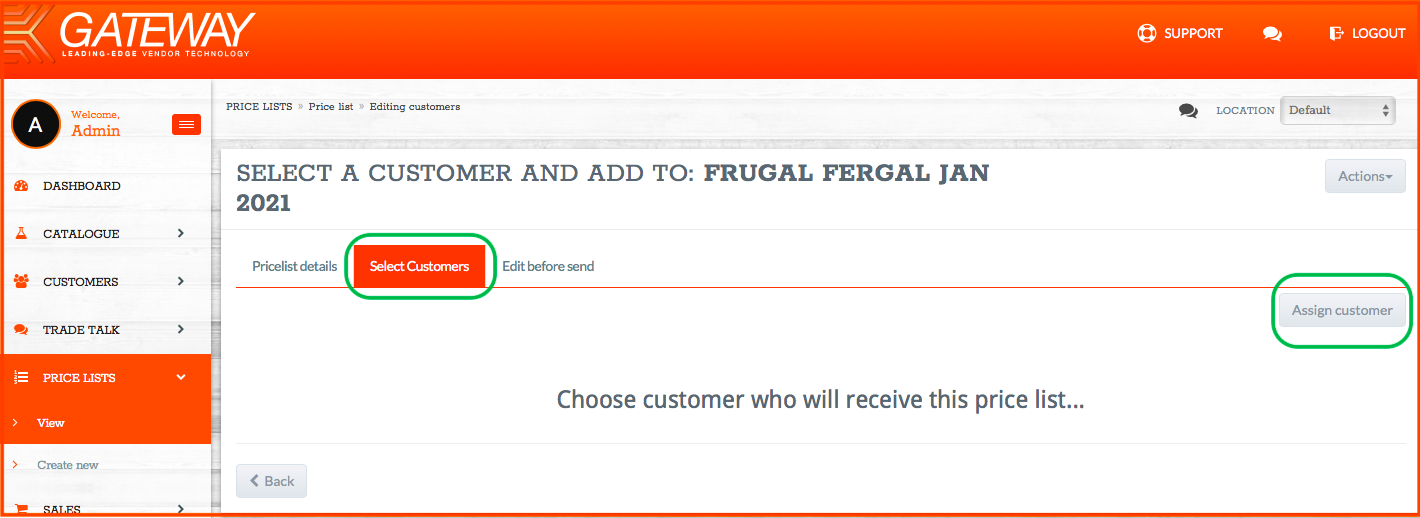
Step 2 – Assign Customers
-
Click Select Customer then Assign Customer
Step 3 – Select Customer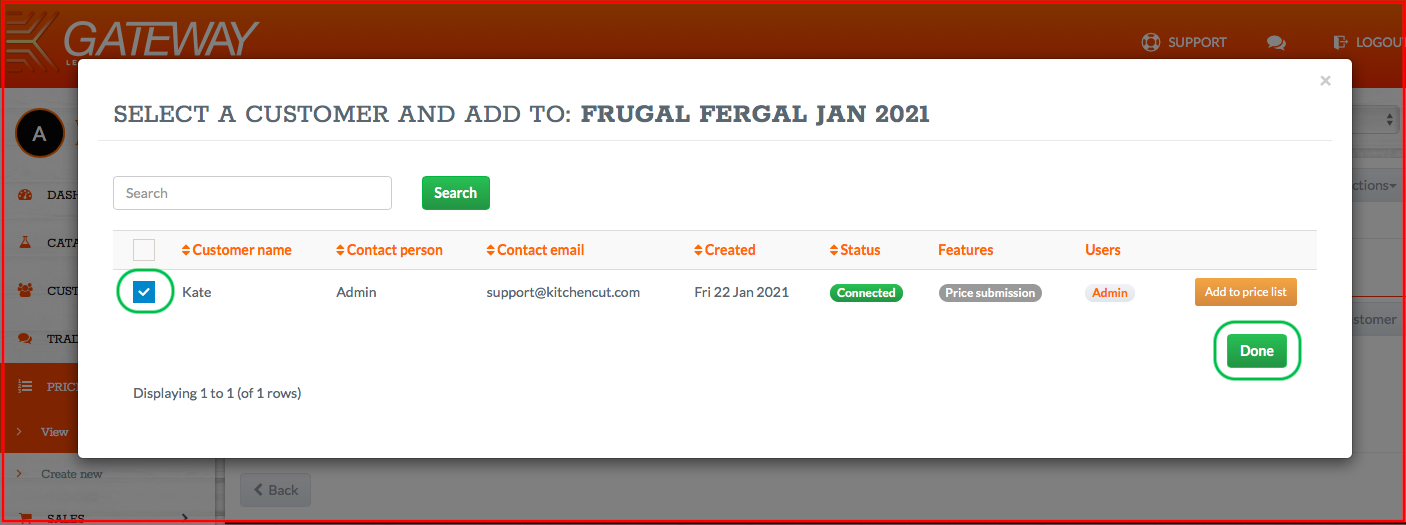
-
Tick the checkbox next to the relevant customer(s)
-
Click Done
Step 4 – Continue to Product Selection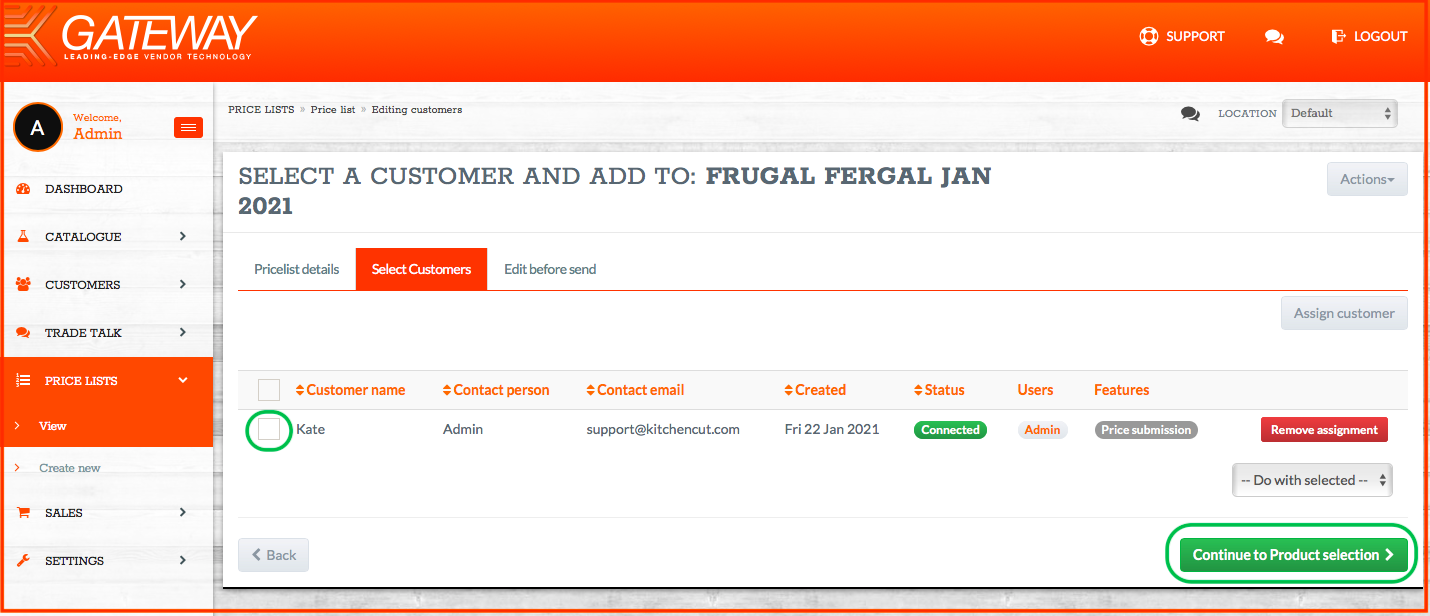
-
Once customers have been assigned, click Continue to product selection
Step 5 – Add Products to the Price List
-
Click Add products manually
-
Use the search bar to find products you want to allocate for the selected customer(s)
Step 6 – Add and Assign Products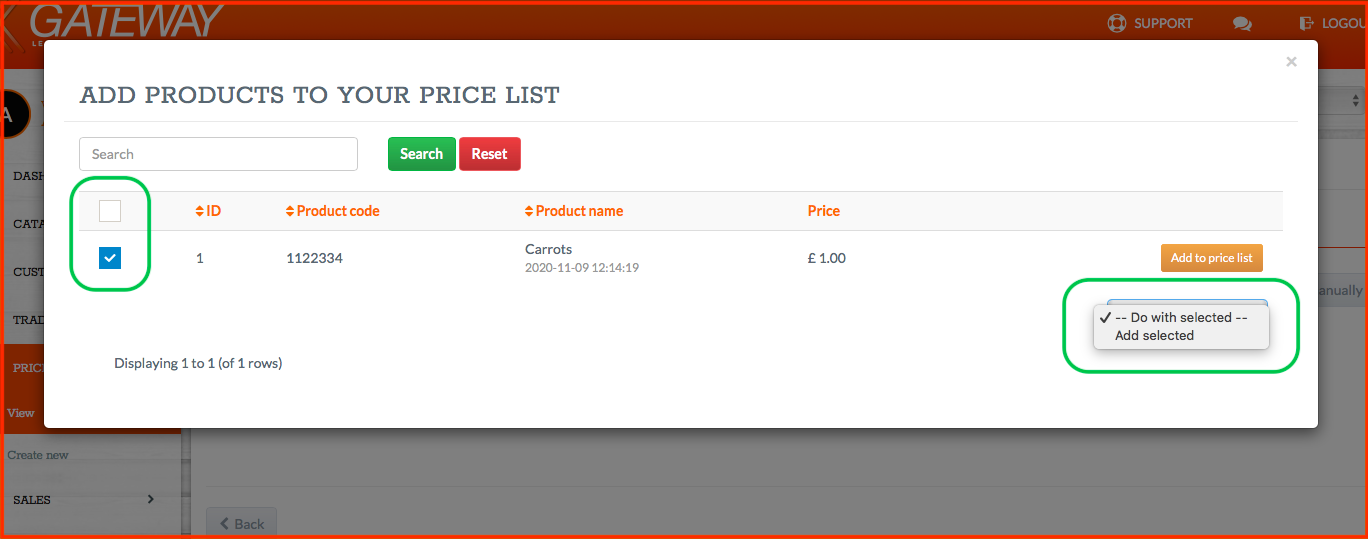
-
Select individual products to add using Add to price list, or
-
Use the multi-tick boxes to select multiple products, then choose Add selected from the dropdown
-
Close the pop-up window by clicking the ✖️ in the top-right corner
Step 7 – Finalise and Send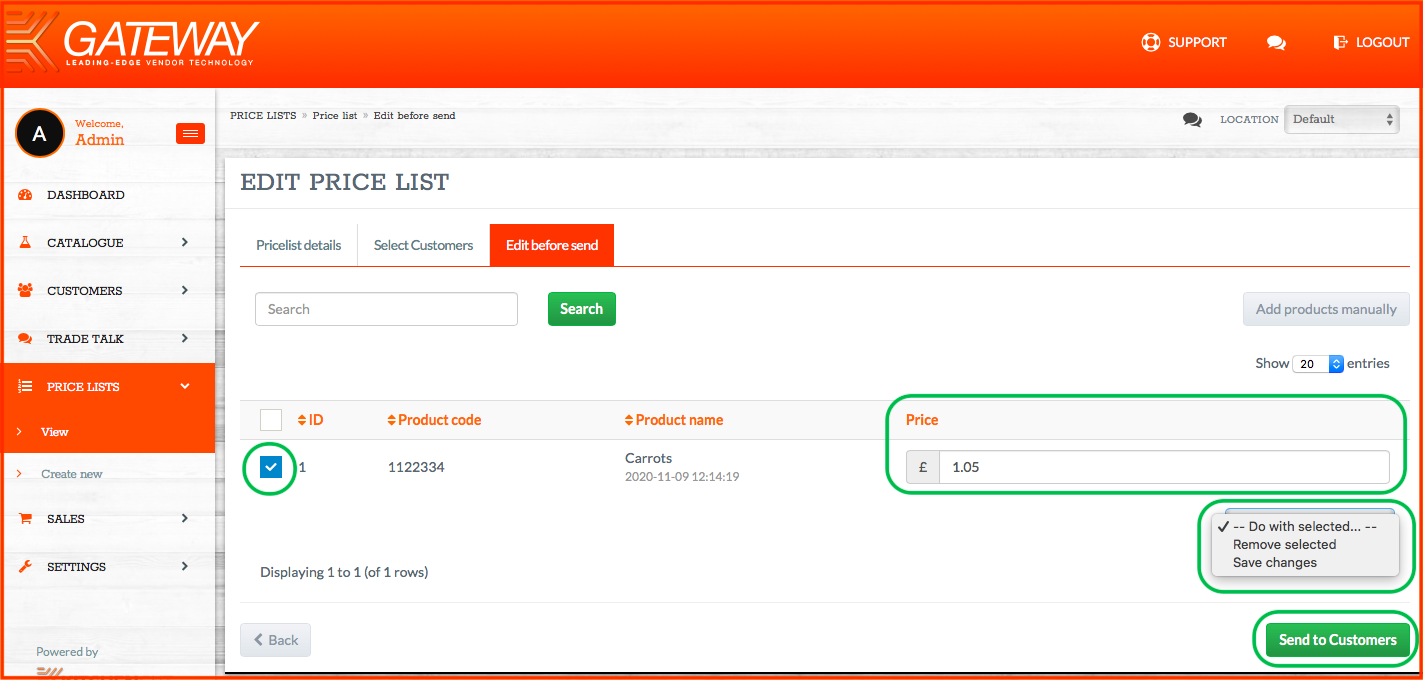
-
Review the items now added to your price list
-
You can:
-
Edit, remove, or change pricing before sending
-
-
To save changes:
-
Tick the top checkbox (to select all)
-
From the Do with selected dropdown, choose Save changes
-
-
Once ready, click Send to Customer
Your customer will receive an email notification. Once they have accepted the price list, its status will change from Sent to Closed.
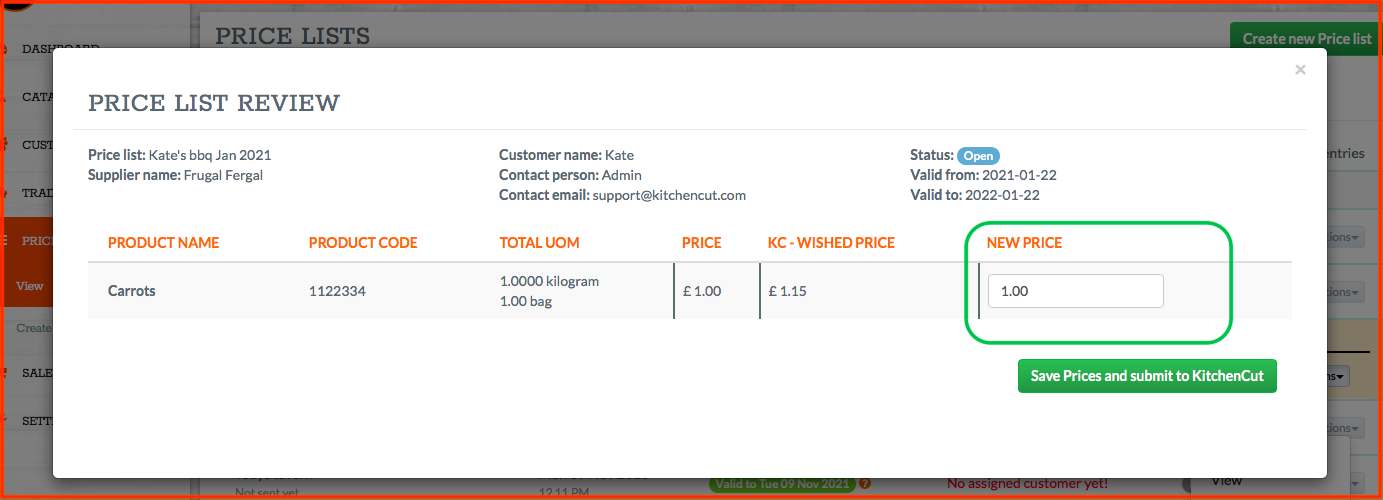
Moderation and Negotiation
If a customer disputes pricing or proposes alternatives, the price list will be flagged with a warning such as: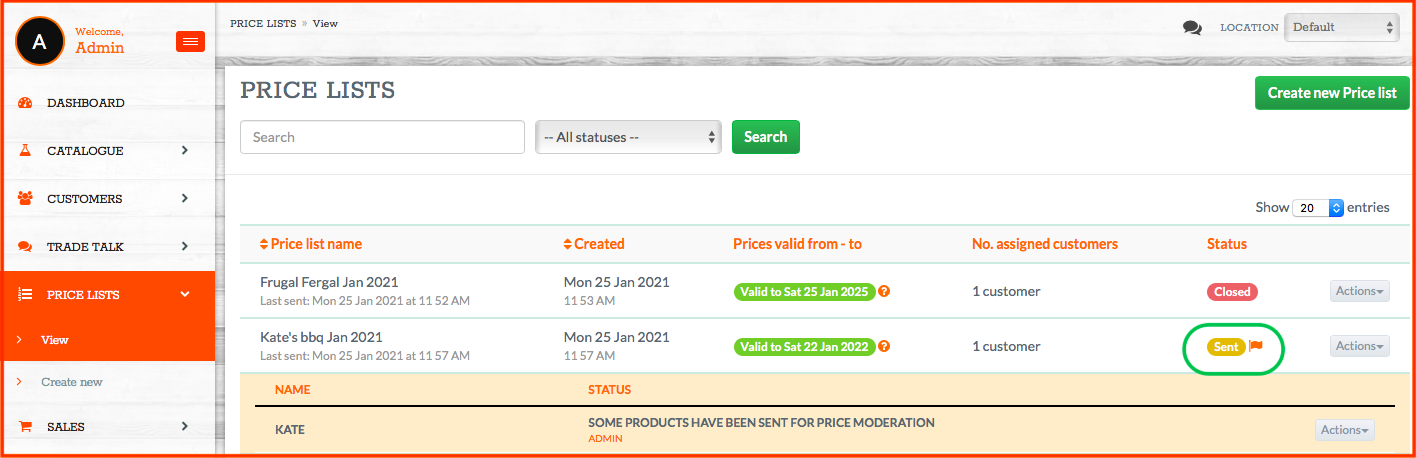
"SOME PRODUCTS HAVE BEEN SENT FOR PRICE MODERATION"
To respond:
-
Open the flagged price list
-
From the Actions dropdown, select Review/Edit
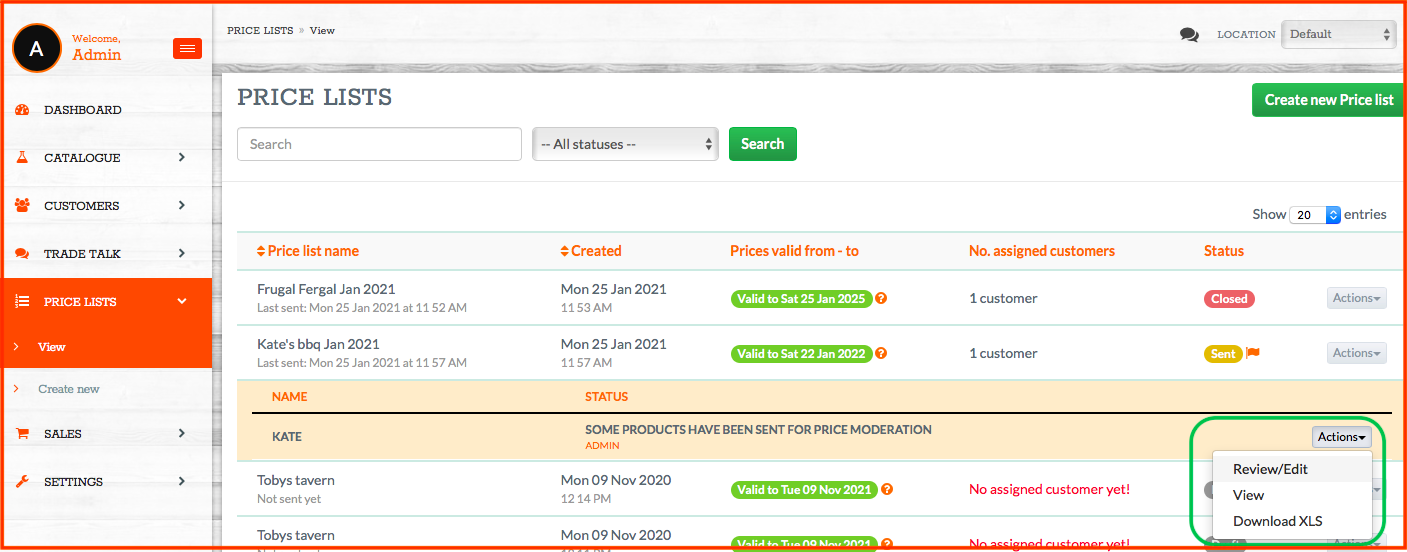
-
Update the relevant prices
-
Click Save prices and submit to Kitchen CUT
Once the customer accepts the new pricing, theprice list status will change to Closed.
💡 Best Practices
-
📆 Set price list expiry dates far enough in the future to avoid accidental cut-off
-
👥 Be precise when assigning customers — check you’ve selected the correct ones
-
🧾 Double-check pricing and products before clicking Send to Customer
-
✍️ Respond promptly to moderation requests to avoid delays in processing
-
🛠 Use bulk selection and the Do with selected dropdown to save time
❓ FAQs
Can I assign one price list to multiple customers?
Yes. You can assign multiple customers during Step 3.
Will the customer receive a notification when a price list is sent?
Yes, they’ll receive an email alert. The list must then be accepted into their system.
Can I reuse or duplicate a previous price list?
This guide covers manual creation. If you'd like to explore duplicating lists, speak to your Customer Success Manager.
What happens if a customer rejects aprice list?
You’ll see a moderation flag. Follow the instructions above to revise and resubmit prices.
Can I track which products were accepted or flagged?
Yes. When you open the price list, products requiring moderation will be highlighted with an explanation.
🆘 Need Help?
📧 Email us at support@kitchencut.com
📝 Submit a support ticket