If allergen data is not provided automatically (e.g. from Gateway suppliers), users can manually enter or edit this information in Kitchen CUT. This ensures your product data complies with legislation such as Natasha’s Law, and supports accurate allergen tracking throughout your recipes and menus.
Manually Edit Allergens for a Single Product
1. Navigate to the Products List
Go to:Suppliers > Products
Search for and open the product you wish to update.

2. Navigate to the Allergens Tab
You’ll see a list of allergens currently tracked by your system.
For each allergen, select one of the following:
-
Does Contain– The allergen is contained in the product -
Not Present– Leave the box blank to reflect no allergen present -
May Contain– There is a risk of cross-contamination
Click Save to apply the changes.
Bulk Edit Allergens via Import/Export
If you need to update allergen information for multiple products, you can do this in bulk using the import/export tool.
1. Export Your Product Data
Go to:Suppliers > Products
Use the Export button to download your full product list in spreadsheet format.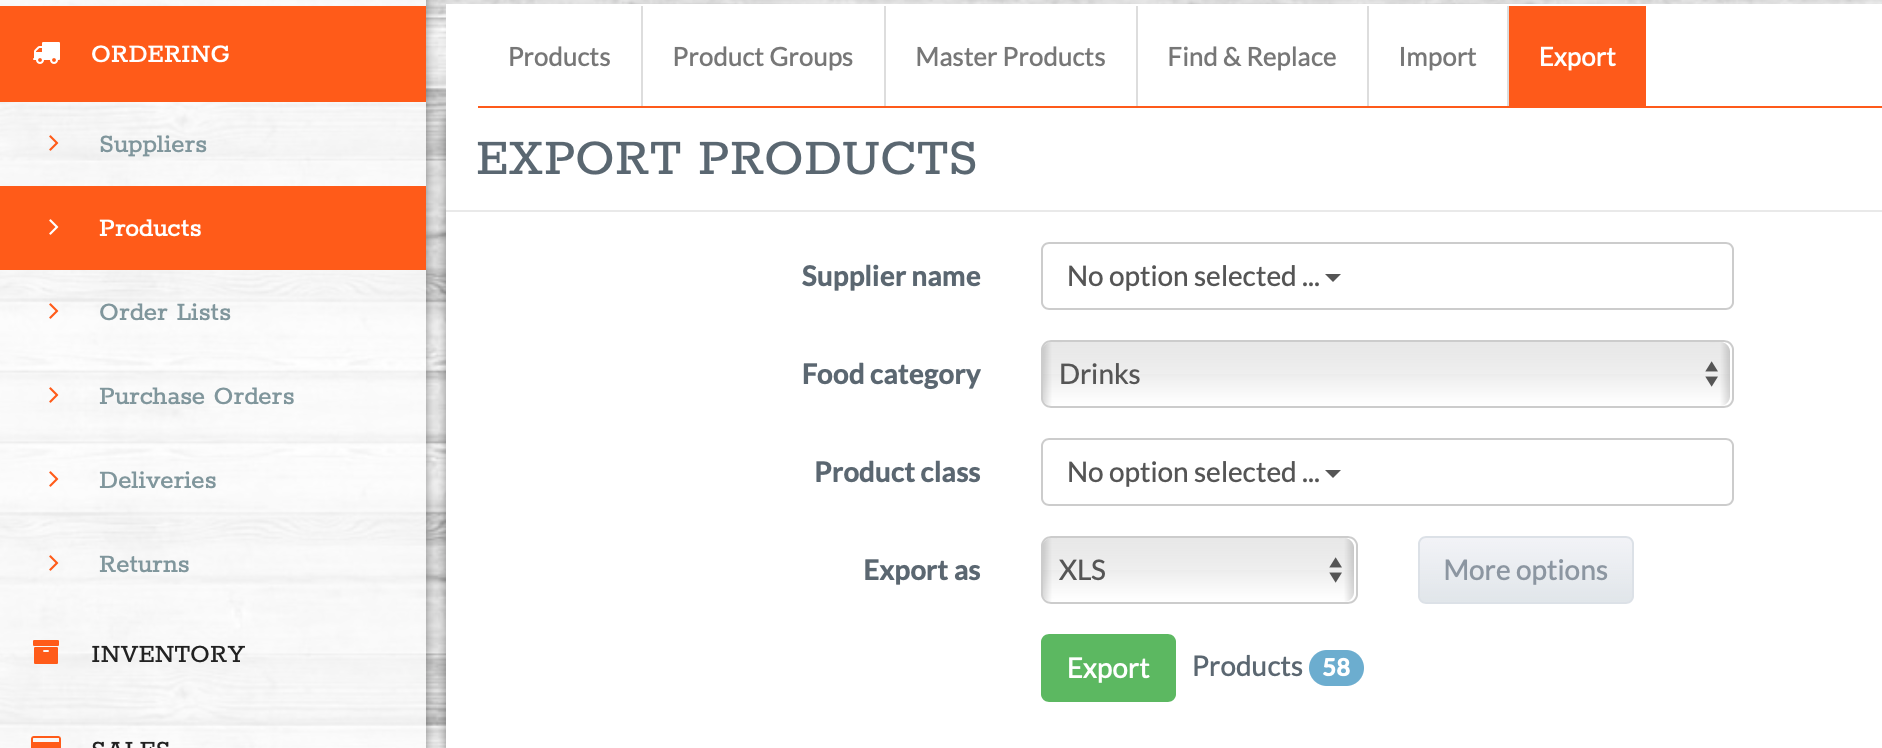
2. Edit Allergen Fields in the Spreadsheet
In the exported file:
-
Locate the allergen columns for each product

-
Enter one of the following values:
-
Y - The allergen is present
-
Leave Blank - Not Present -
M - May Contain -
Leave blank if unknown
-
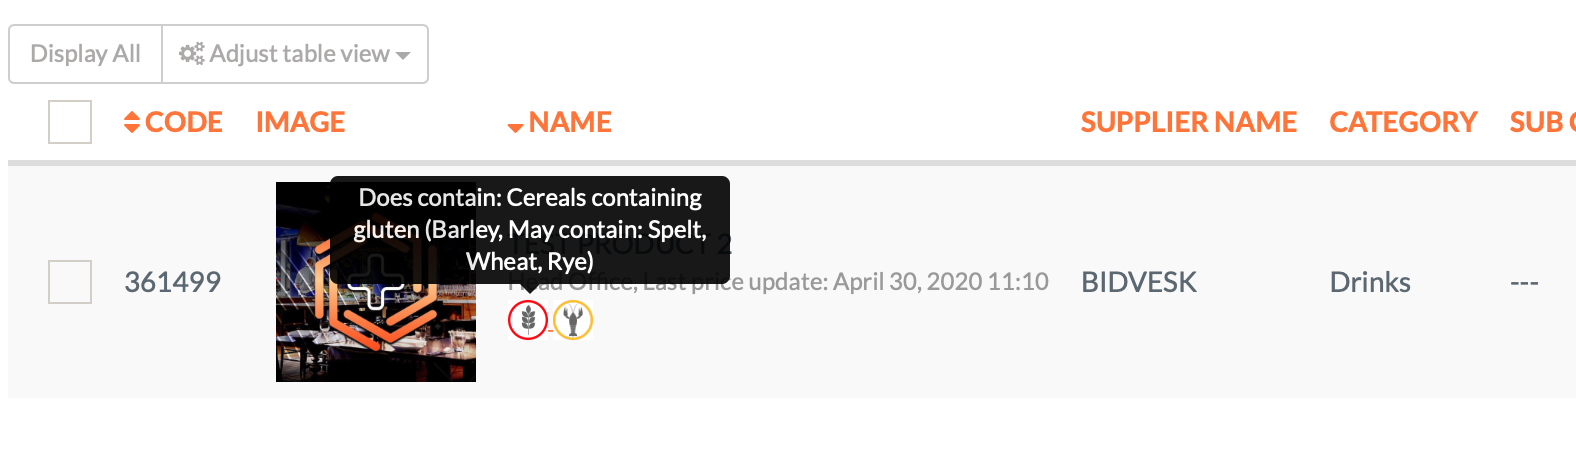
- Please note, when indicating sub-allergens you can select strings of as many sub-allergens as required. For example in the below screenshot, it has been indicated that the second product contains Gluten, definitely from Barley, and may contain Spelt, Rye, and Wheat as well.

Save the updated file in the same format.
3. Import the Updated File Back Into Kitchen CUT
Return to:Suppliers > Products
Click Import and upload your updated file.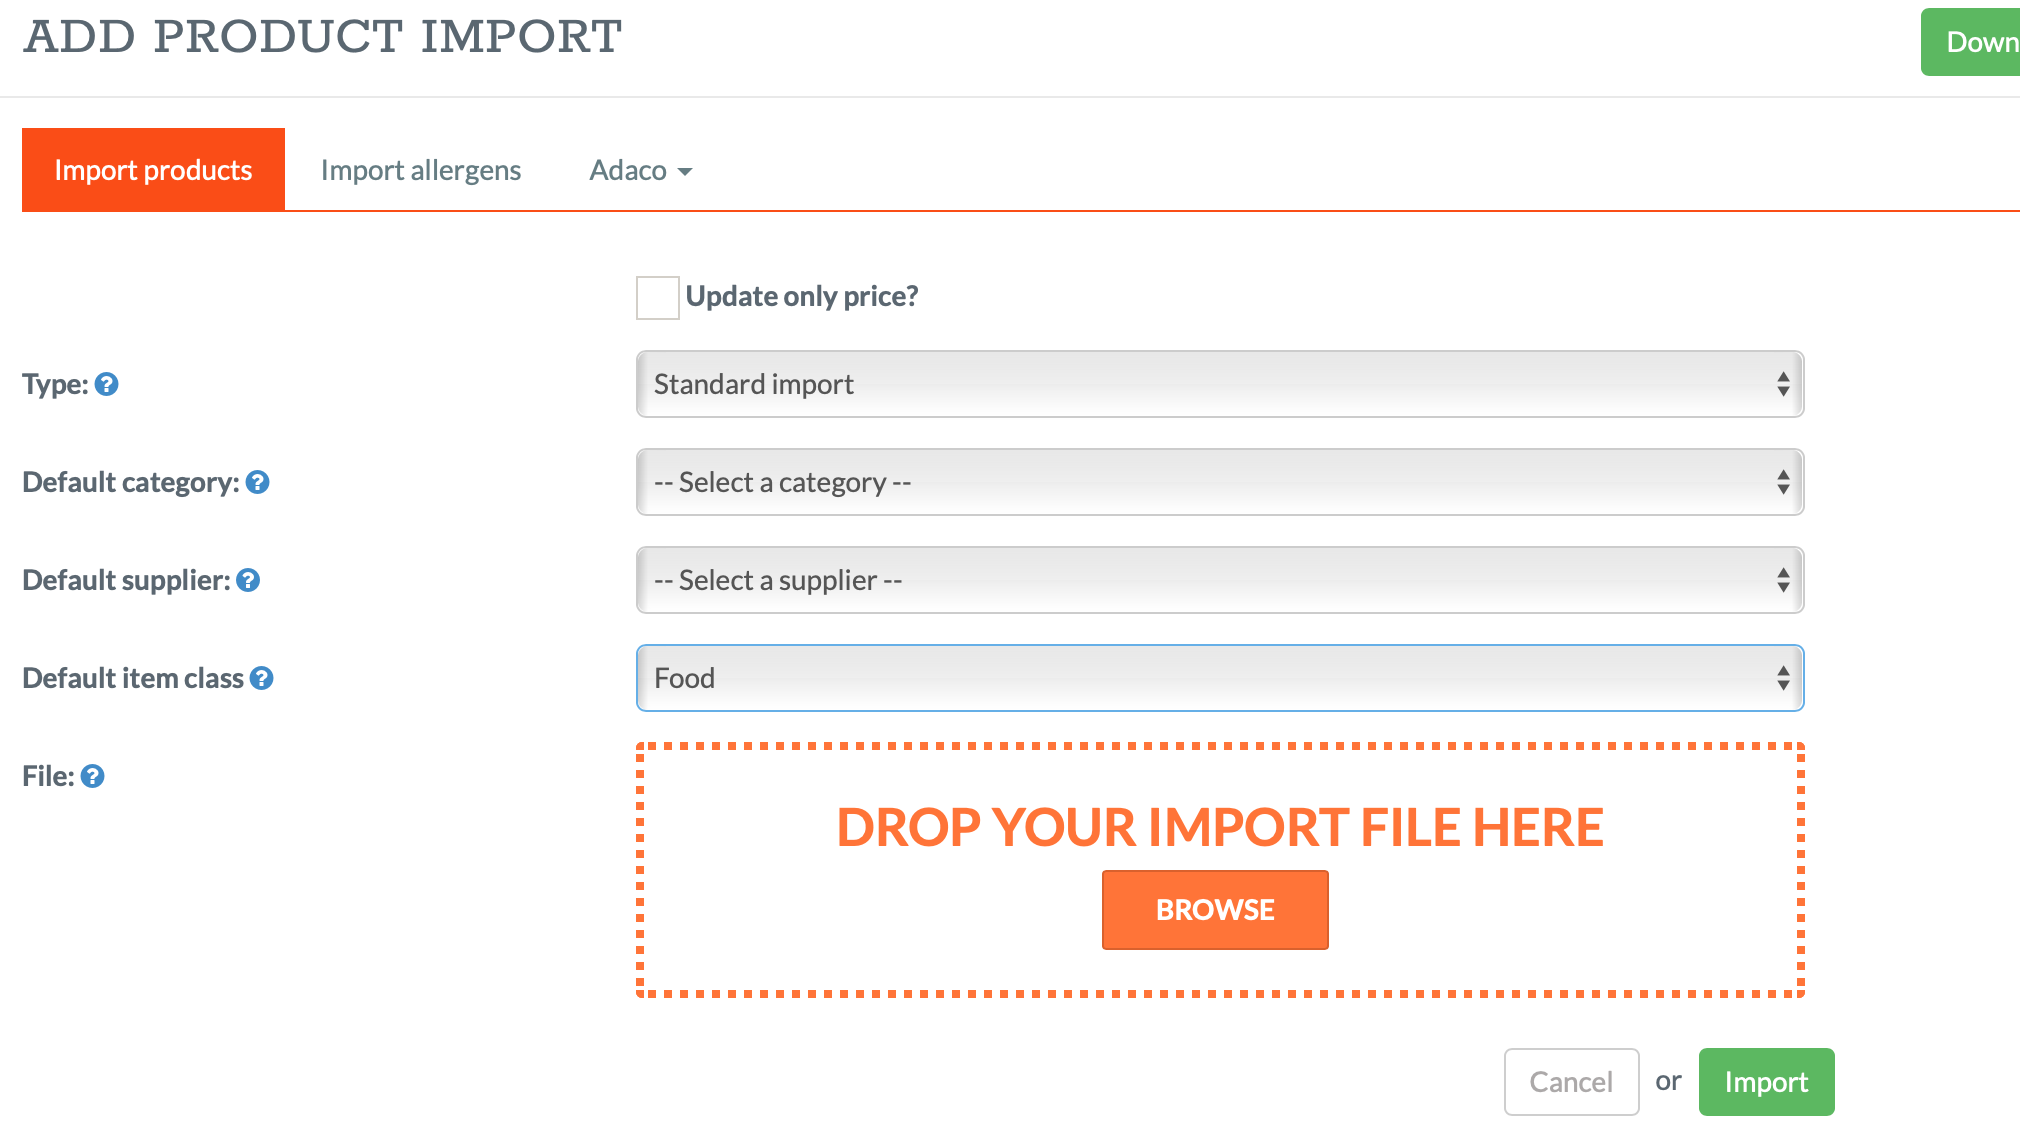
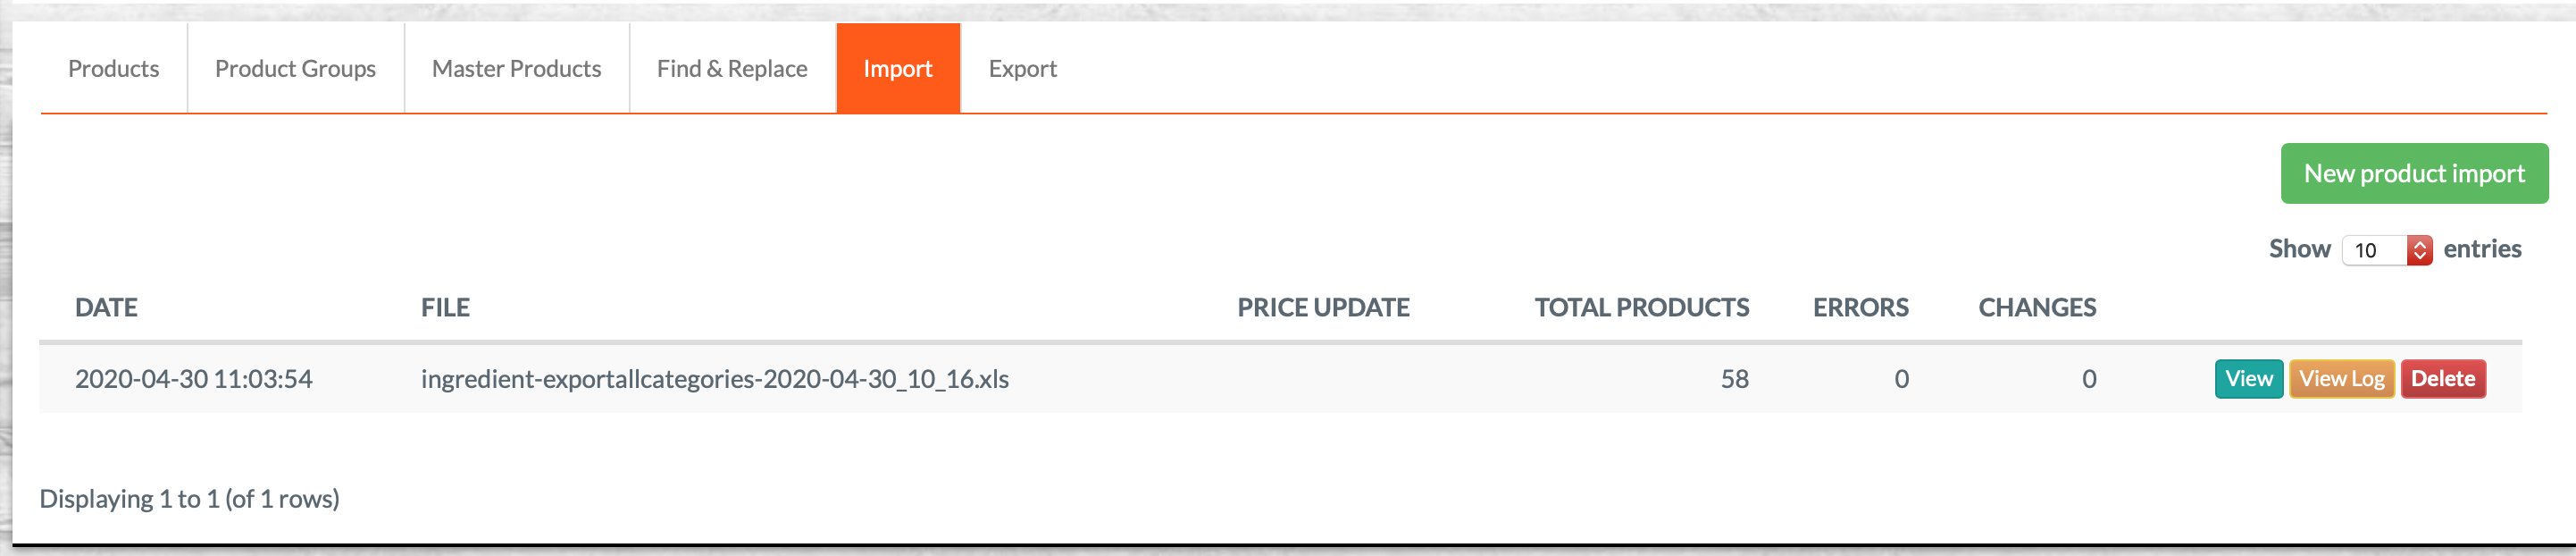
- Once the import file has been uploaded, you will need to accept in the change. View your import:
- If you deem the updated information to be correct, and the system has not flagged any errors, confirm your updates into the system.
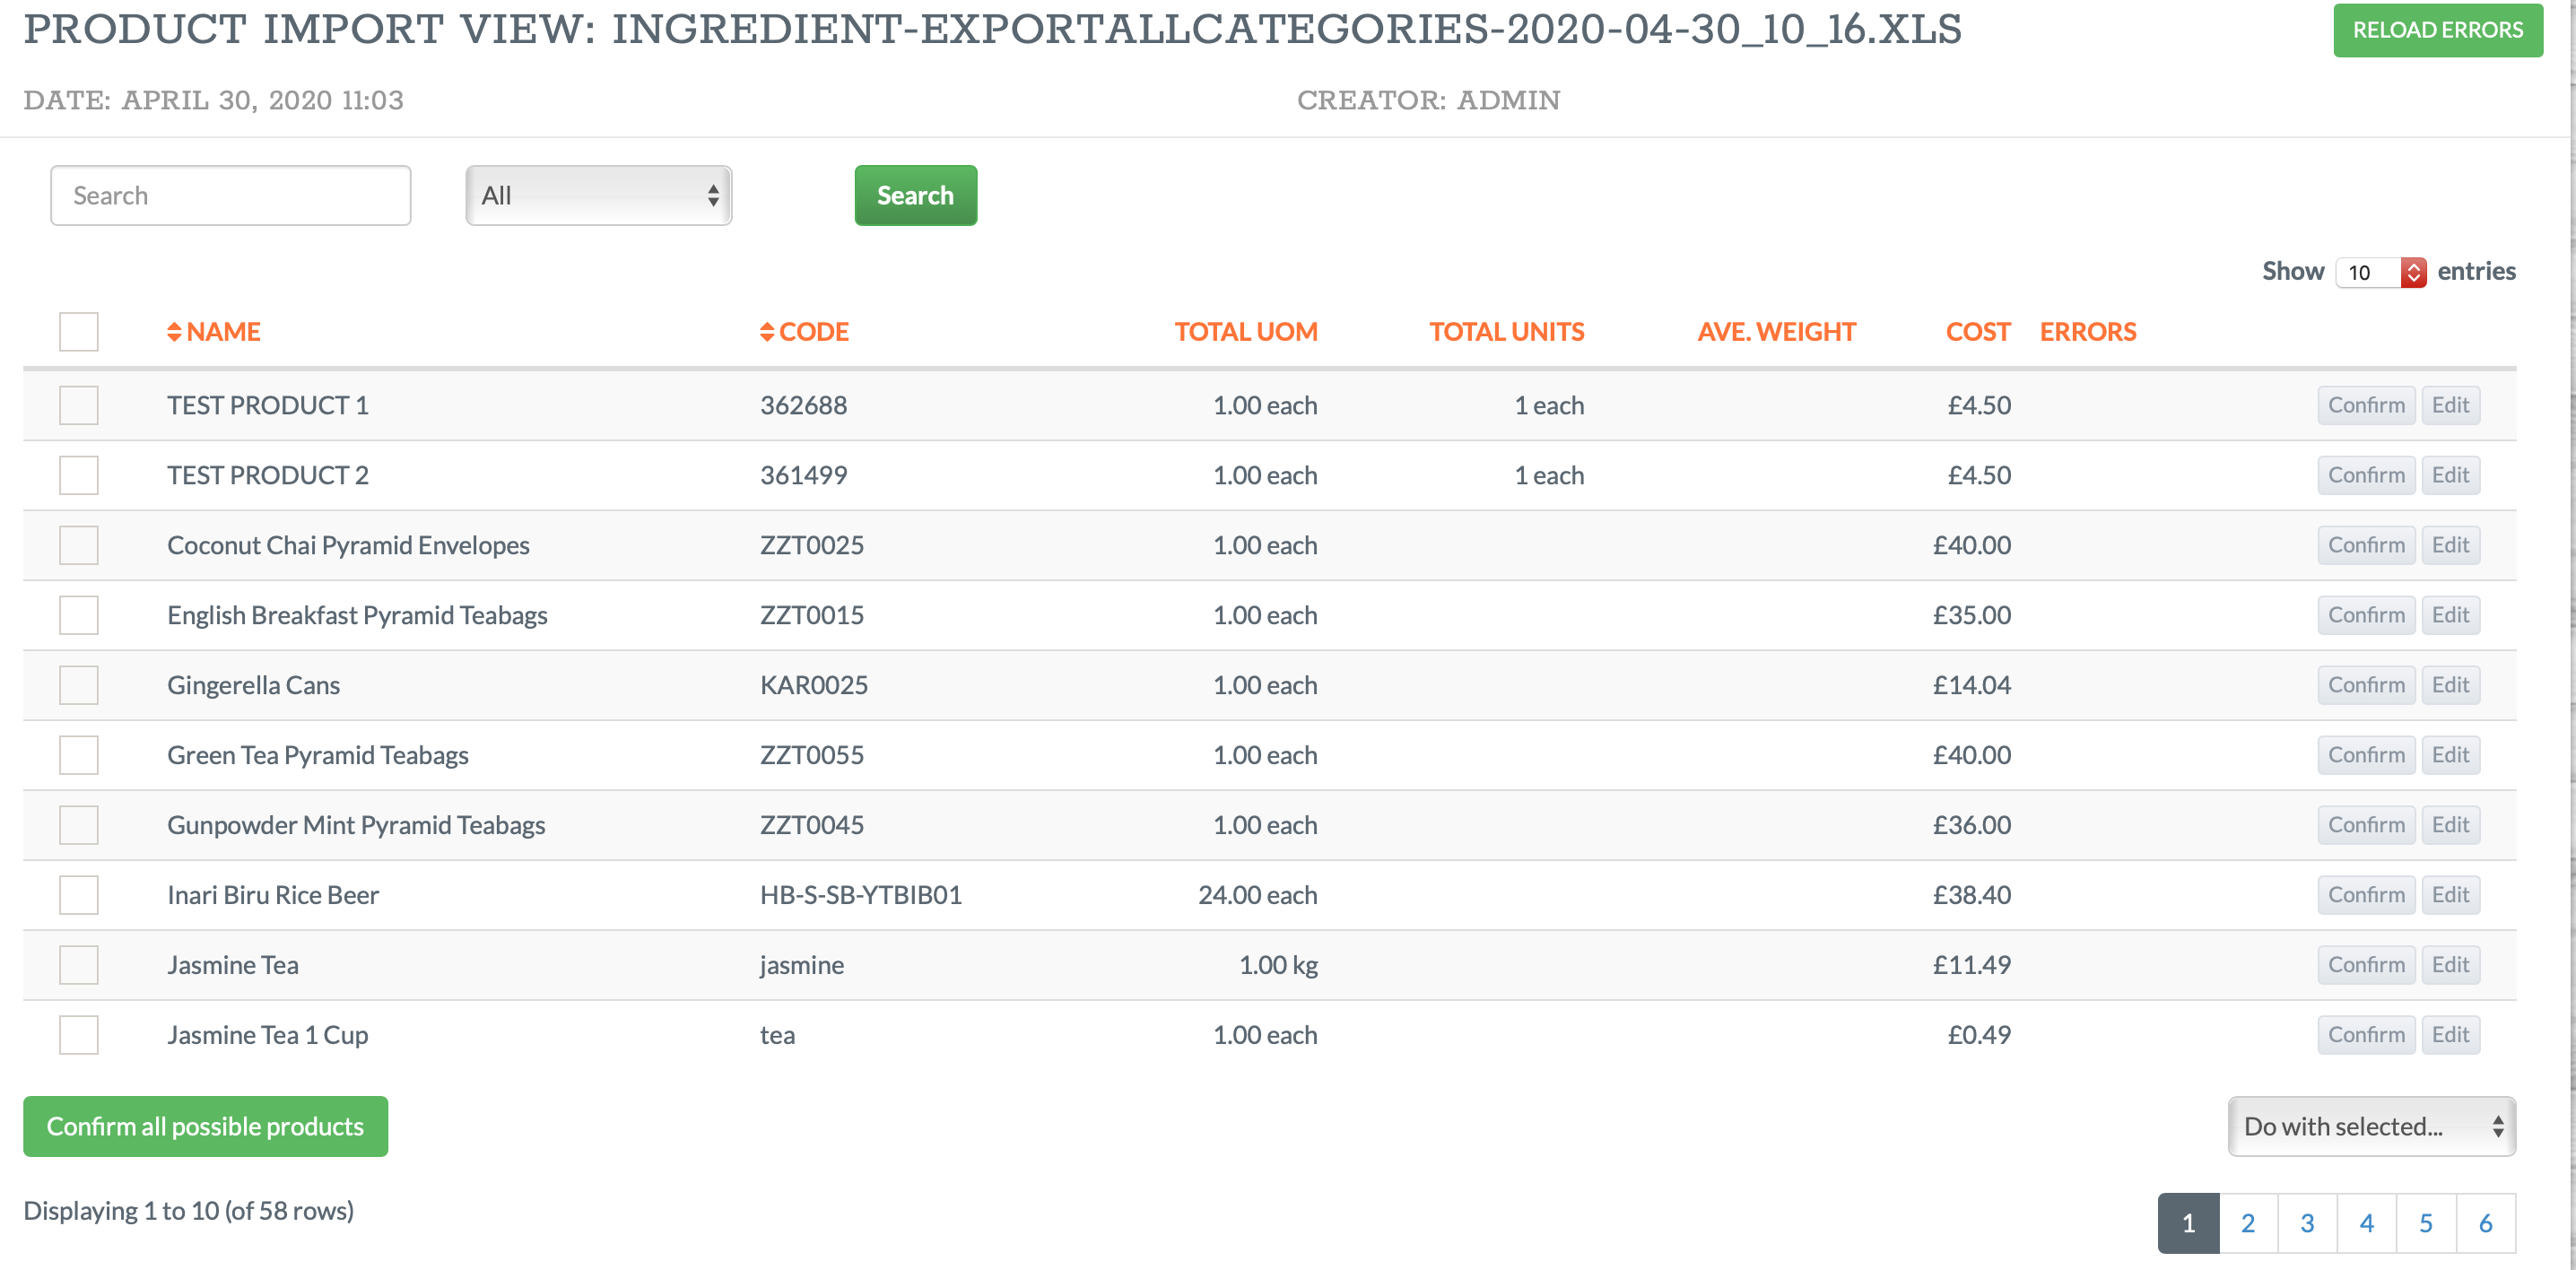
- The system will apply the allergen updates across your product catalogue.
💡 Best Practices
-
Always review product packaging or supplier data sheets before entering allergen information.
-
Use
May Containto indicate potential cross-contamination risk in shared production environments. -
Use bulk import/export when updating more than a few products to save time and minimise input errors.
❓FAQs
Can I override allergen data from a Gateway supplier?
Yes — manual entries and bulk uploads will override existing data, including those received via Gateway.
Can I add new allergens to my system?
Yes — navigate to Settings > Menu Costing > Allergens to create and manage custom allergens.
Will these changes update linked recipes and menus?
Yes — allergen information automatically flows through to recipes and menus that use the affected products.
🆘 Need Help?
📧 Email Support: support@kitchencut.com
📝 Submit a Ticket: Submit a ticket