The Supplier Gateway gives you direct access to submit and manage product pricing for your Kitchen CUT clients. This guide covers how to access the portal, upload product catalogues, manage users and settings, and handle client feedback.
Step-by-Step Instructions
1. Accessing the Supplier Gateway
You’ll receive an email with an auto-login link from Kitchen CUT. Click the link to access your Supplier Gateway dashboard directly.
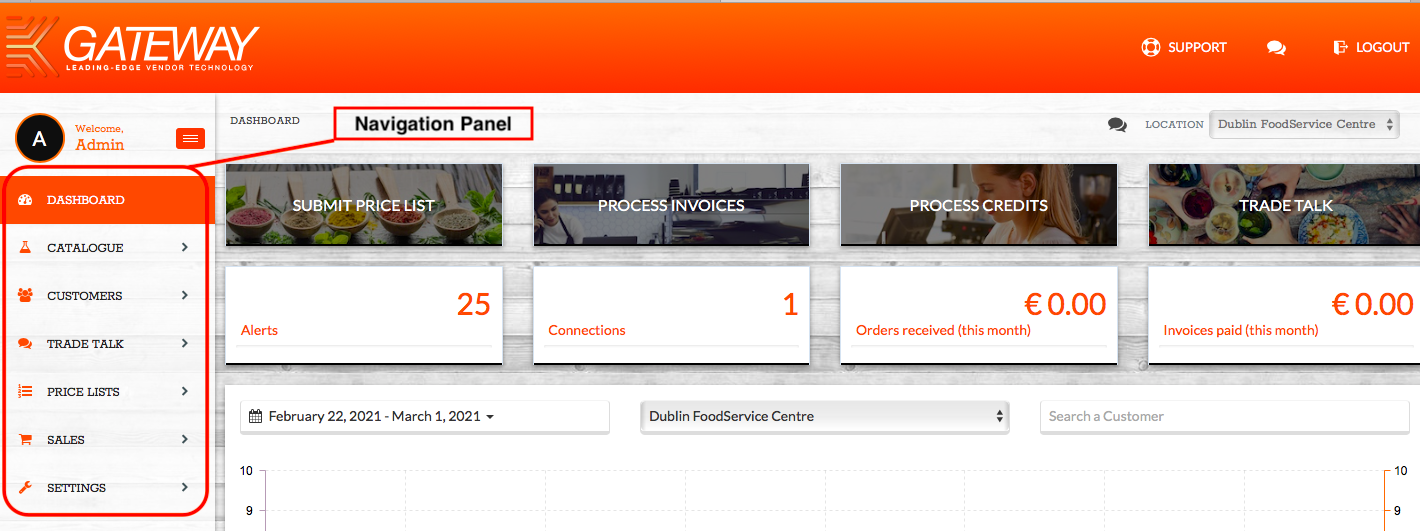
2. Understanding the Navigation Panel
Once logged in, familiarise yourself with the left-hand navigation menu. Most of your tasks — like uploading product files or managing customers — begin here.
3. The Catalogue
The Catalogue logs all products you supply to customers, including any price variations. This master list is your central product record, and can be referenced when assigning products to individual clients.
Uploading a New Product Catalogue
-
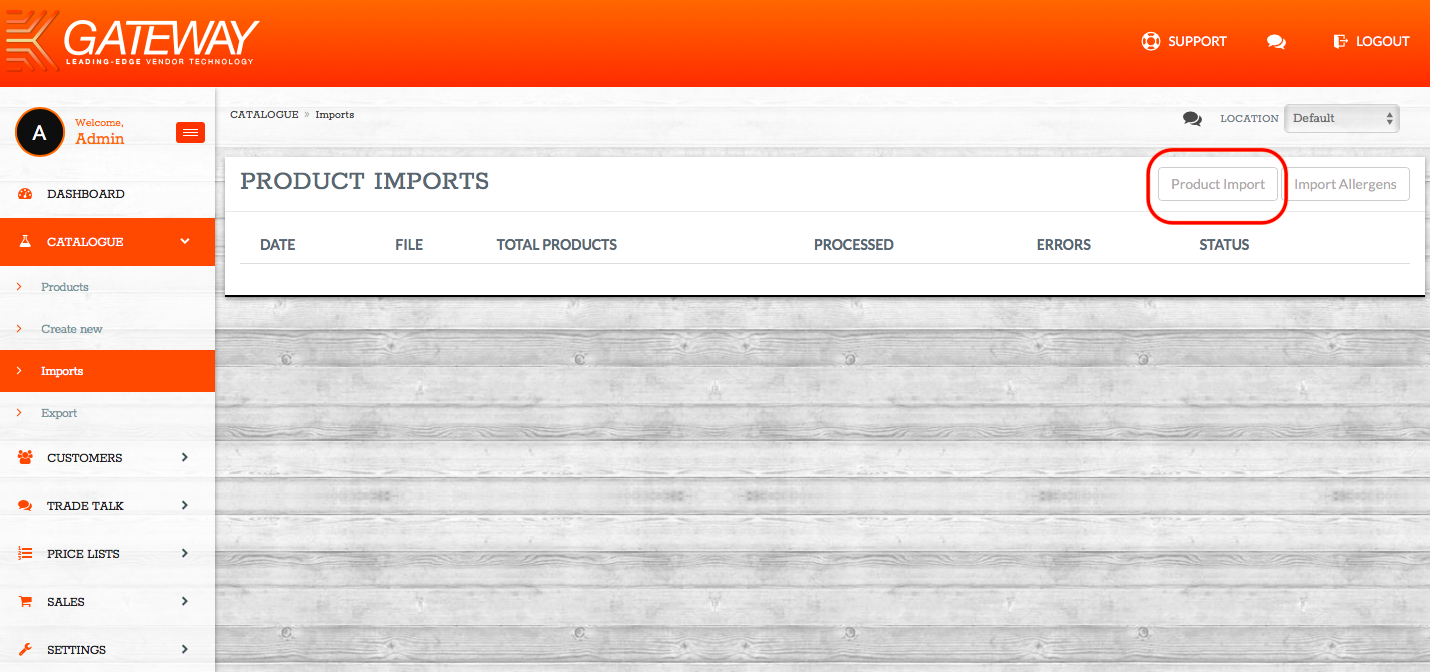
From the Navigation Panel, go to
Catalogue > Imports.
(See also: How to upload products to your Gateway catalogue) -
Click Product Import on the right-hand side.
-
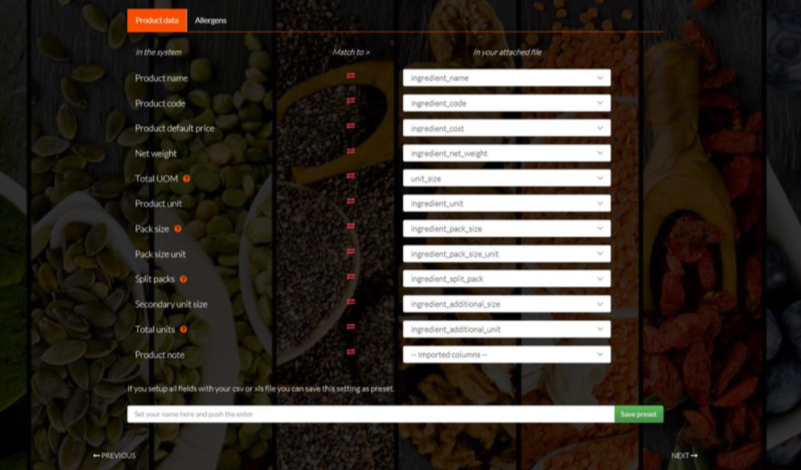
On the Easy Import Wizard:
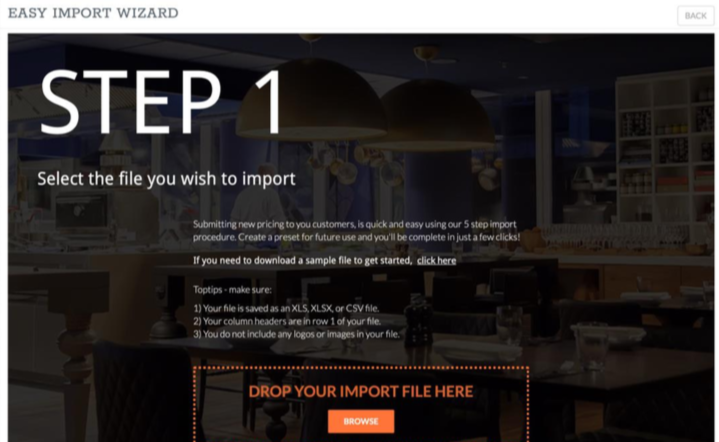
-
Browse and select your formatted import file.
-
Once uploaded, you’ll move automatically to Step 2.
-
-
On Step 2, ensure Gateway import process is ticked and click Next.

-
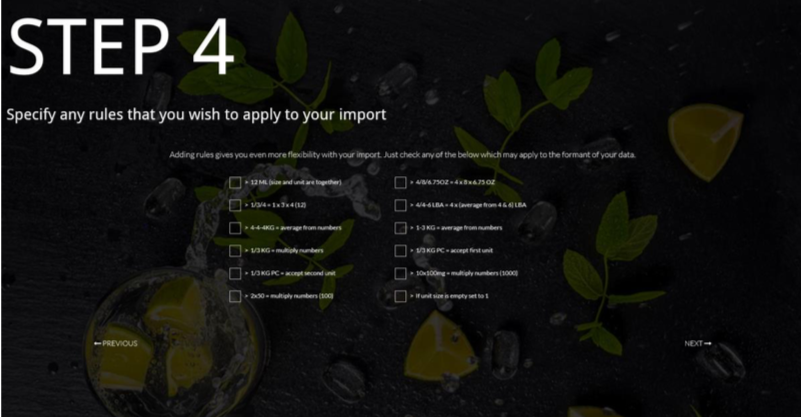
Steps 3 and 4 require no changes. Just click Next.
-
At Step 5, click Import.
-
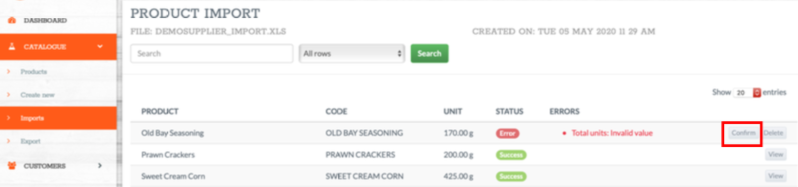
The next page shows all products being imported. Any errors will be flagged. Click Confirm to fix any issues.
-
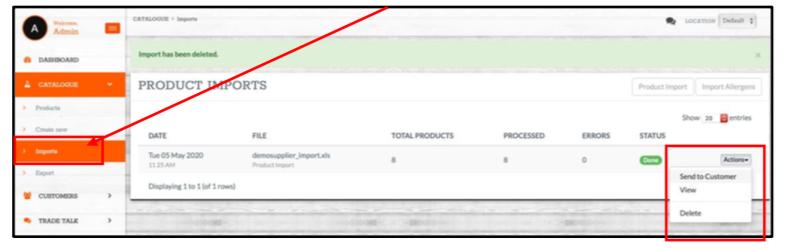
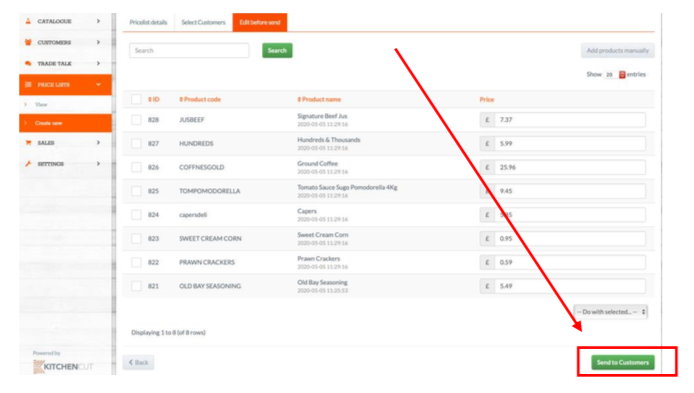
Once resolved, go back to Imports to view a summary record. Click Actions > Send to Customer.
-
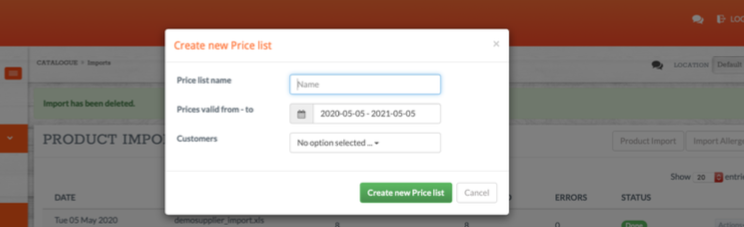
Enter:
-
A name for the price list (visible to the customer).
-
Customers the list should be sent to.
-
Valid from / to dates.
-
-
Click Create New Price List. You’ll now be in the Price Lists section, where you can review prices before clicking Send to Customer.
Reviewing an Existing Formatted File
-
Go to
Customers > View. -
Choose the customer whose file you want to review.
-
Click Actions > Export Products to XLS.
-
Review and edit the exported file as needed, maintaining the same format.
(Refer to the separate user guide if unsure.)
Adding New Users to the Gateway
-
Go to
Settings > Users. -
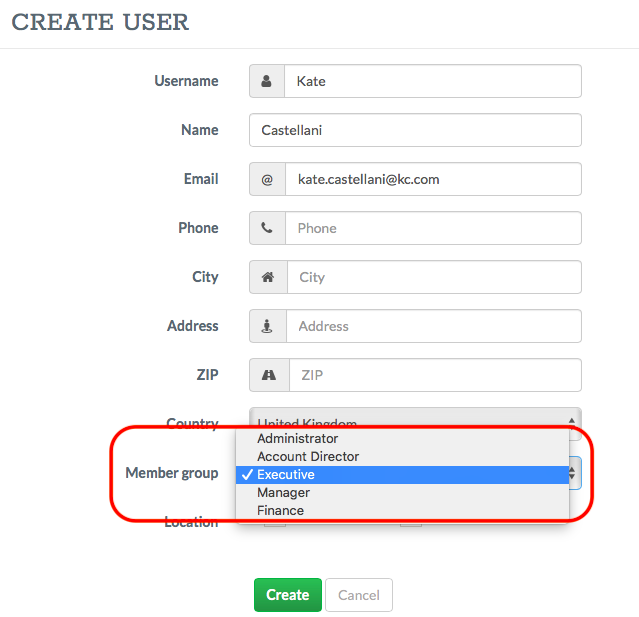
Click Create User.
-
Fill out the user details and assign Member Group: Executive. Click Create.
-
The user will receive an email link to log in.
-
To assign users to clients:
-
Go to
Customers > View, then click Actions > Assign User.
-
Completing Your Company Information
-
Go to
Settings > Business. -
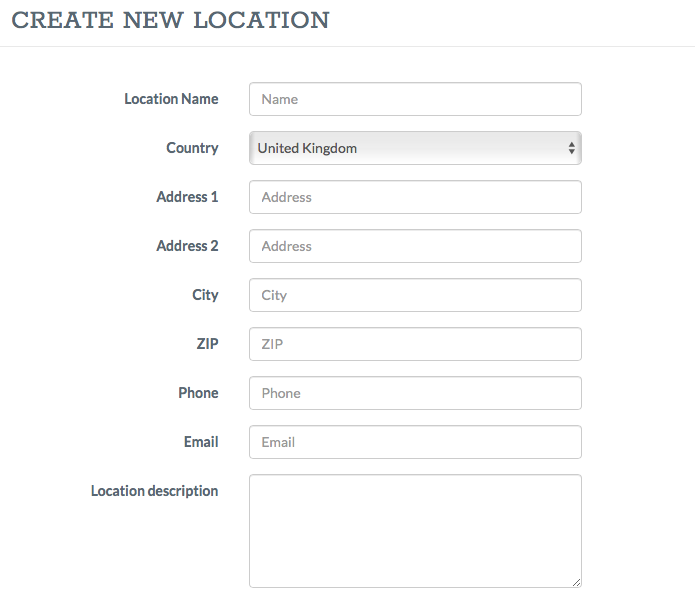
Click on the Locations tab.

-
Click Actions > Edit next to your listed location.
-
Fill in all contact and business details, then Save.
What Happens When Products Are Declined?
If a client declines certain products in a submitted price file:
-
You’ll receive an email notification listing the declined products and any suggested changes.

-
Log into the Gateway and edit the declinedproducts.
-
Re-submit the amended products to the client via the Price Lists section.
💡 Best Practices
-
Always use the correct import format to avoid upload errors.
-
Assign Executive permissions to new users so they have full access.
-
Keep your business contact information updated to ensure smooth communication with your clients.
❓ FAQs
What file format is required for product imports?
Product imports must use the pre-approved Gateway template. Contact your Kitchen CUT account manager if unsure.
Can I assign multiple customers to a price list?
Yes. When sending a price list, you can select multiple customers from the dropdown.
What if my customer requests pricing changes?
You can amend and re-submit prices using the Price Lists area under the Actions dropdown.
🆘 Need Help?
📧 Email us at support@kitchencut.com
📝 Submit a support ticket