This guide walks you through closing your stock at the end of a reporting or accounting period. This process locks in your final stock holding, carries values forward into the next period, and ensures reporting accuracy across Kitchen CUT.
When to Use This Guide
If this is the first time you're completing a stock take for the outlet, refer to the Initial Stock Take Setup Guide first.
If you already have an active stock take and are looking to finalise a reporting period, this is the right guide for you.
Before You Begin
Make sure the following are complete and submitted for the period you are closing:
-
✅ A stock take (AST or CST) is entered and submitted
-
✅ All Deliveries have been accepted
-
✅ All Transfers have been confirmed
-
✅ Any Wastage records have been submitted
-
✅ Sales Records have been uploaded
📍 Step-by-Step: Closing Your Inventory Period
1. Go to:
Inventory > Stock Takes > Outlet Inventory Count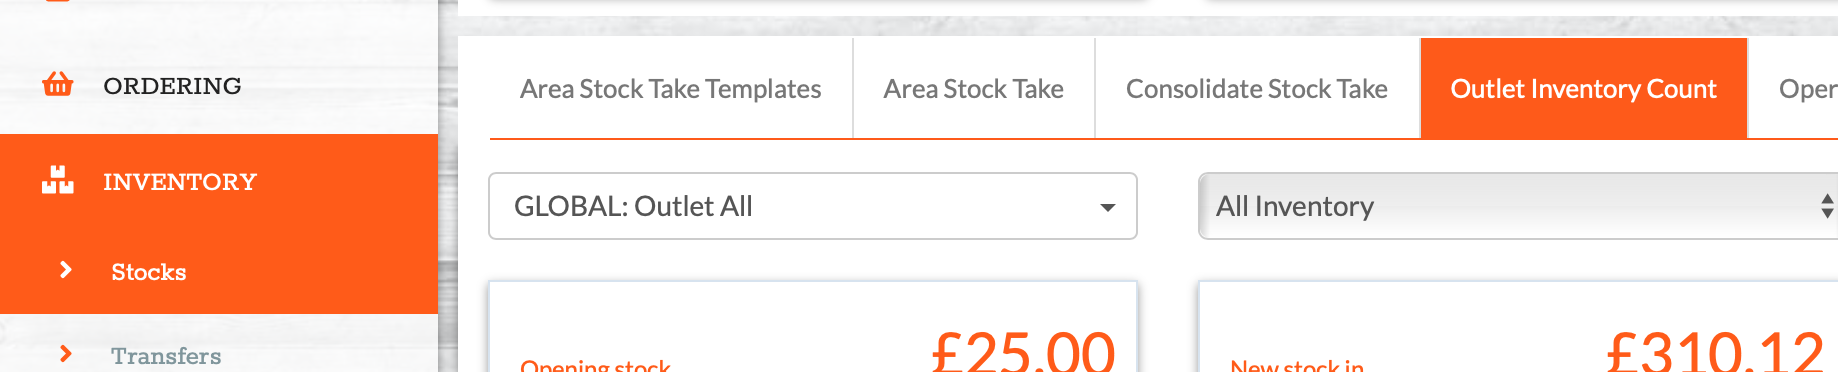
2. Find your active inventory record
Use the filters to find the relevant Outlet and Class, then click:
Actions > Manage Closing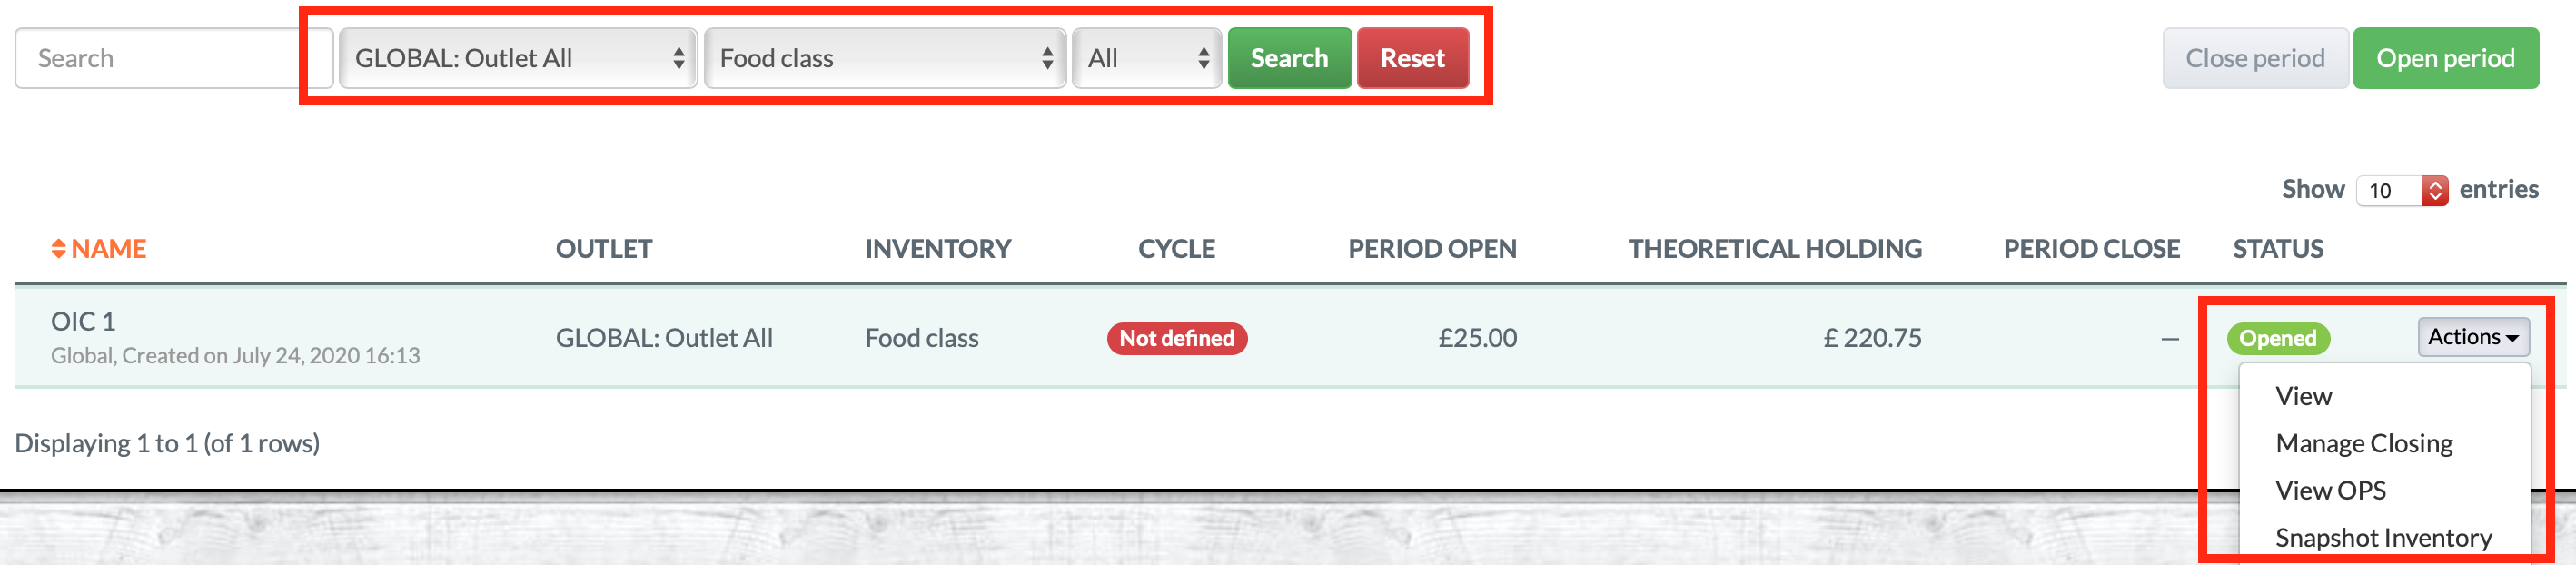
3. Name your new inventory period
A popup will appear. You can:
-
Name the new period by date (e.g. “15/07/2025”)
-
Or label it by cycle (e.g. “Week 1”, “July – Wk 3”, etc.)
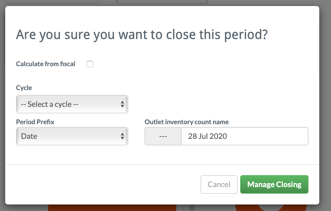
Click Manage Closing to continue.
ℹ️ You’ll now see the new period listed above the one you're closing.
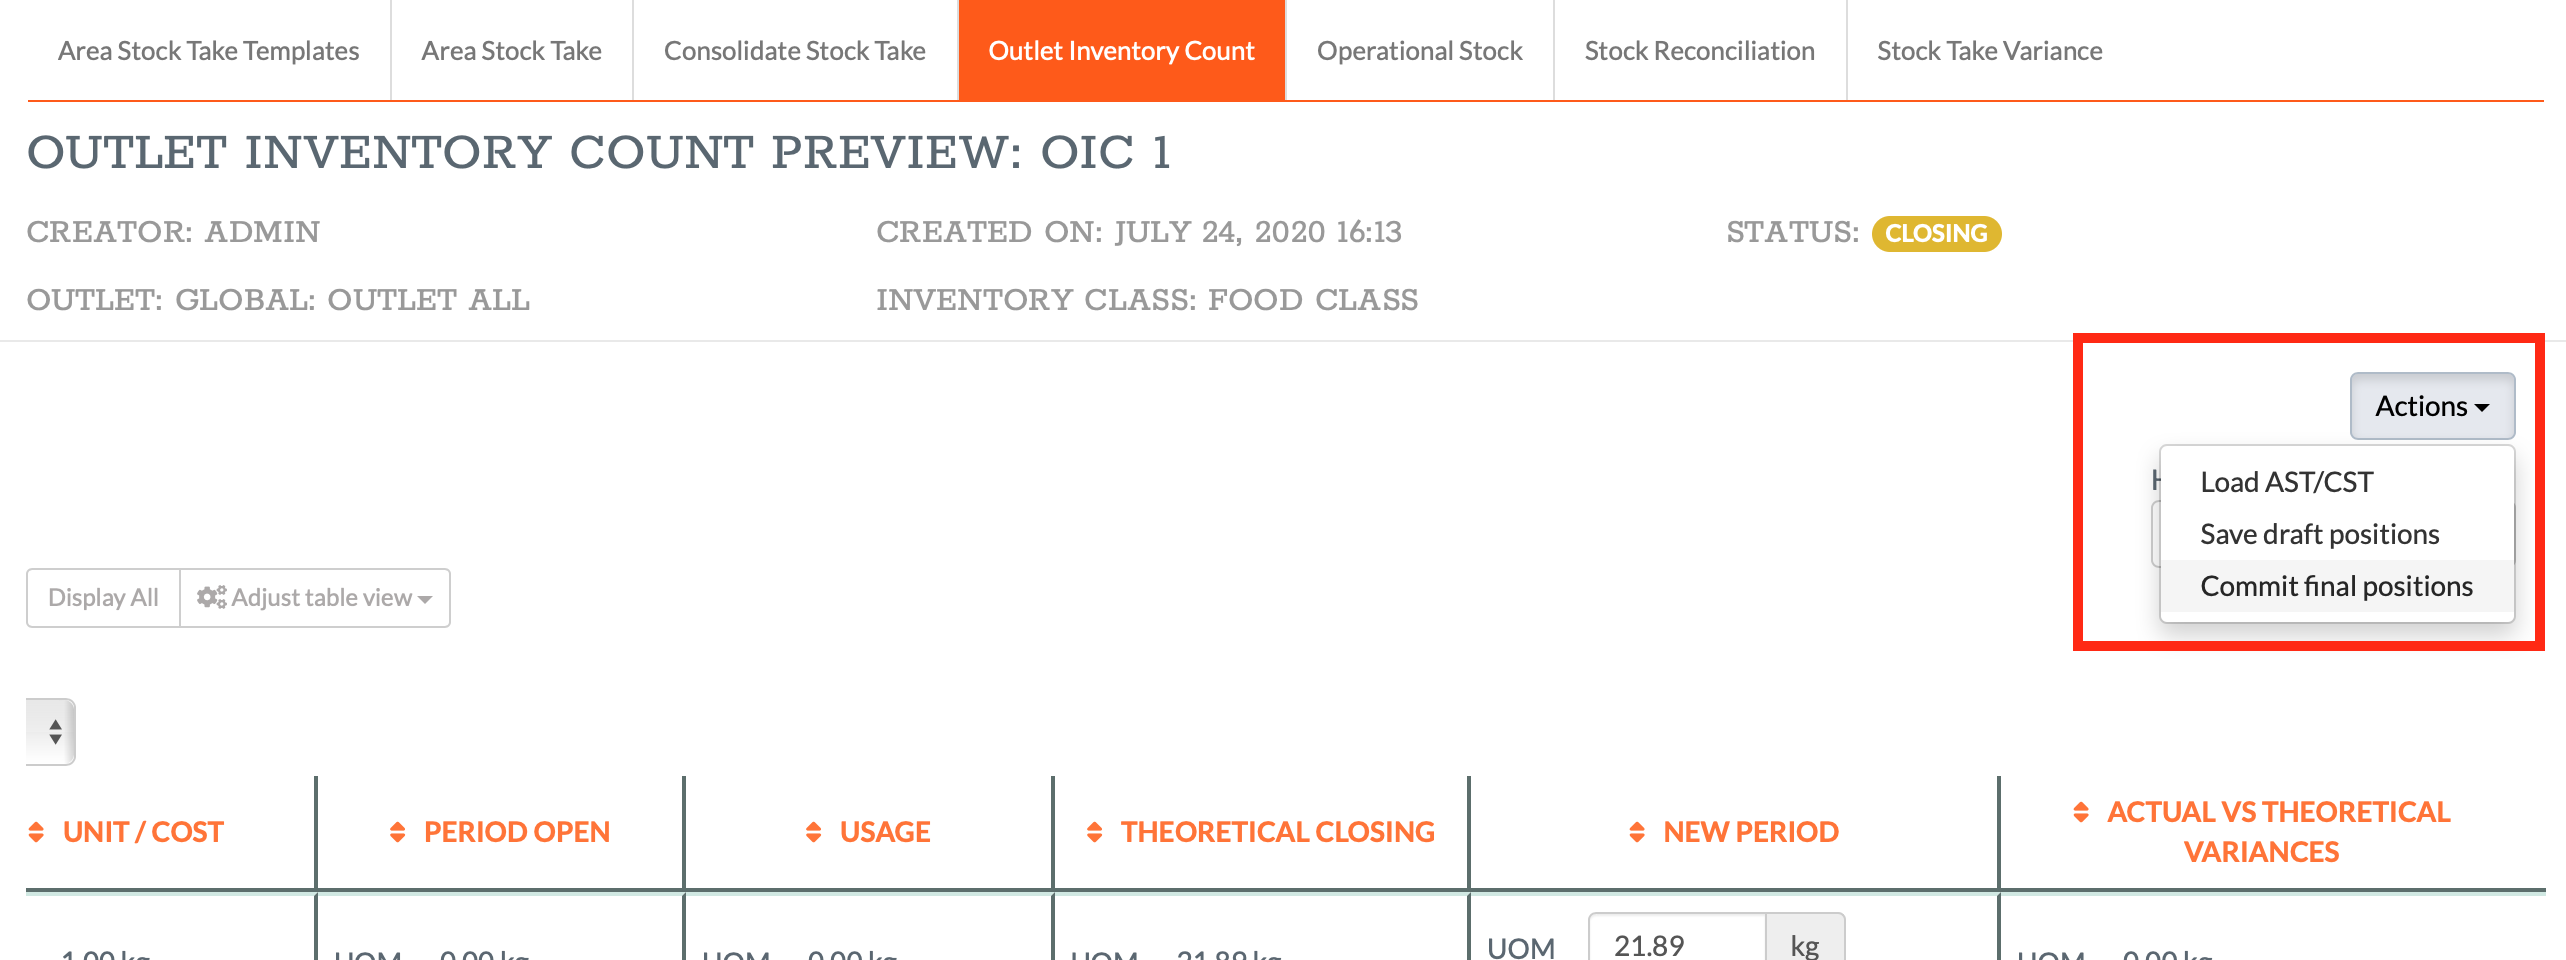
4. Click Actions > Manage Preview on the new (Closing) period
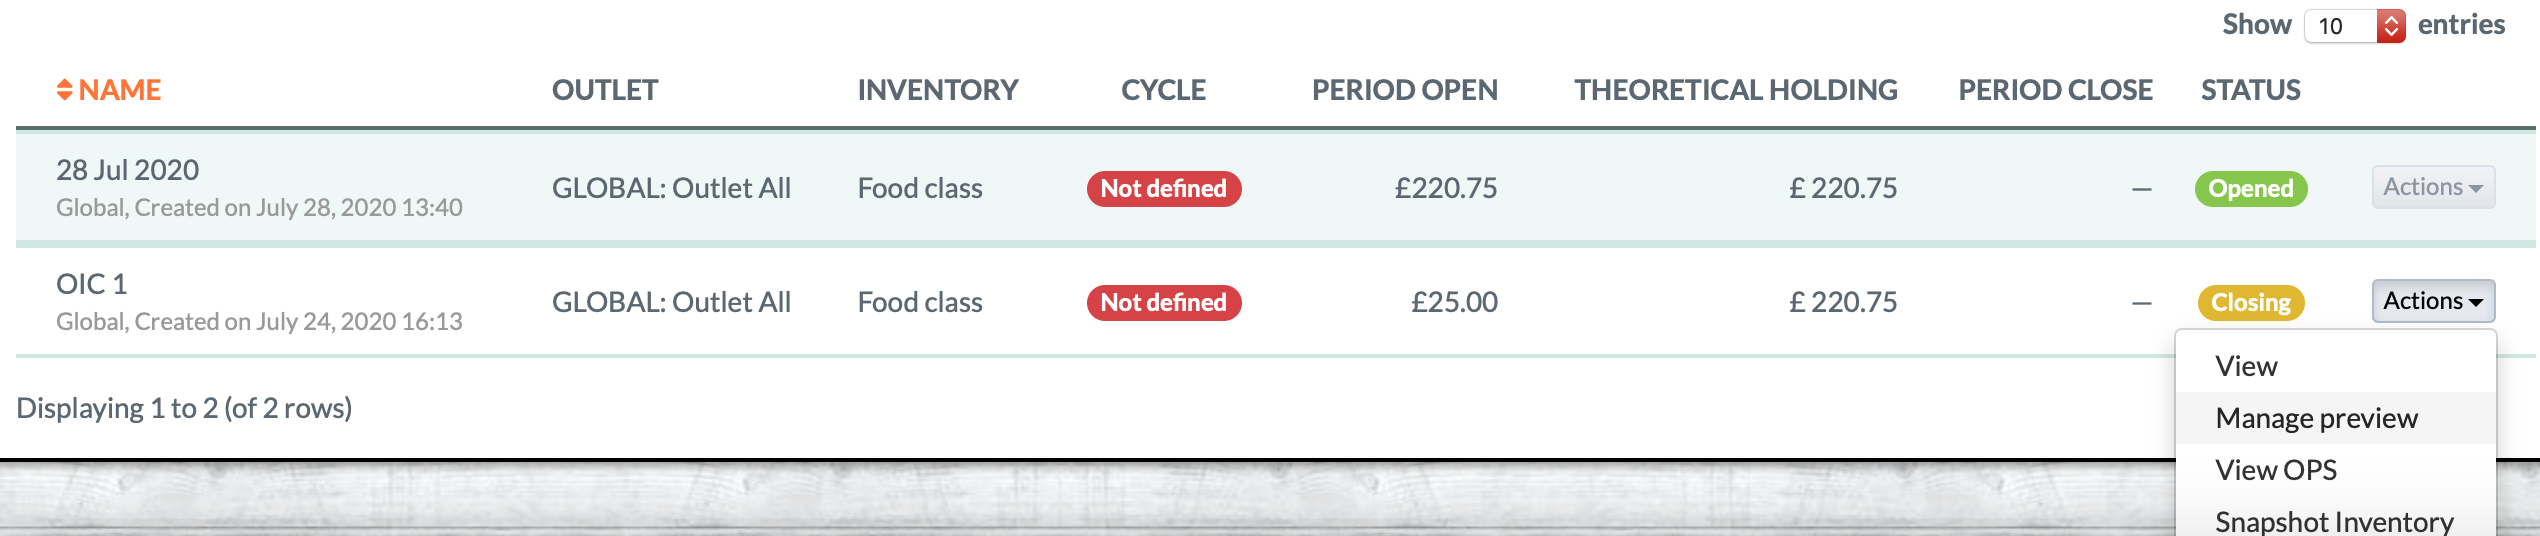 A pop-up will prompt you to load your stock take record.
5. Load your AST or CST
Select the appropriate record:
-
If you have a Consolidated Stock Take, choose the correct Routine Type
-
Click Load next to the relevant record
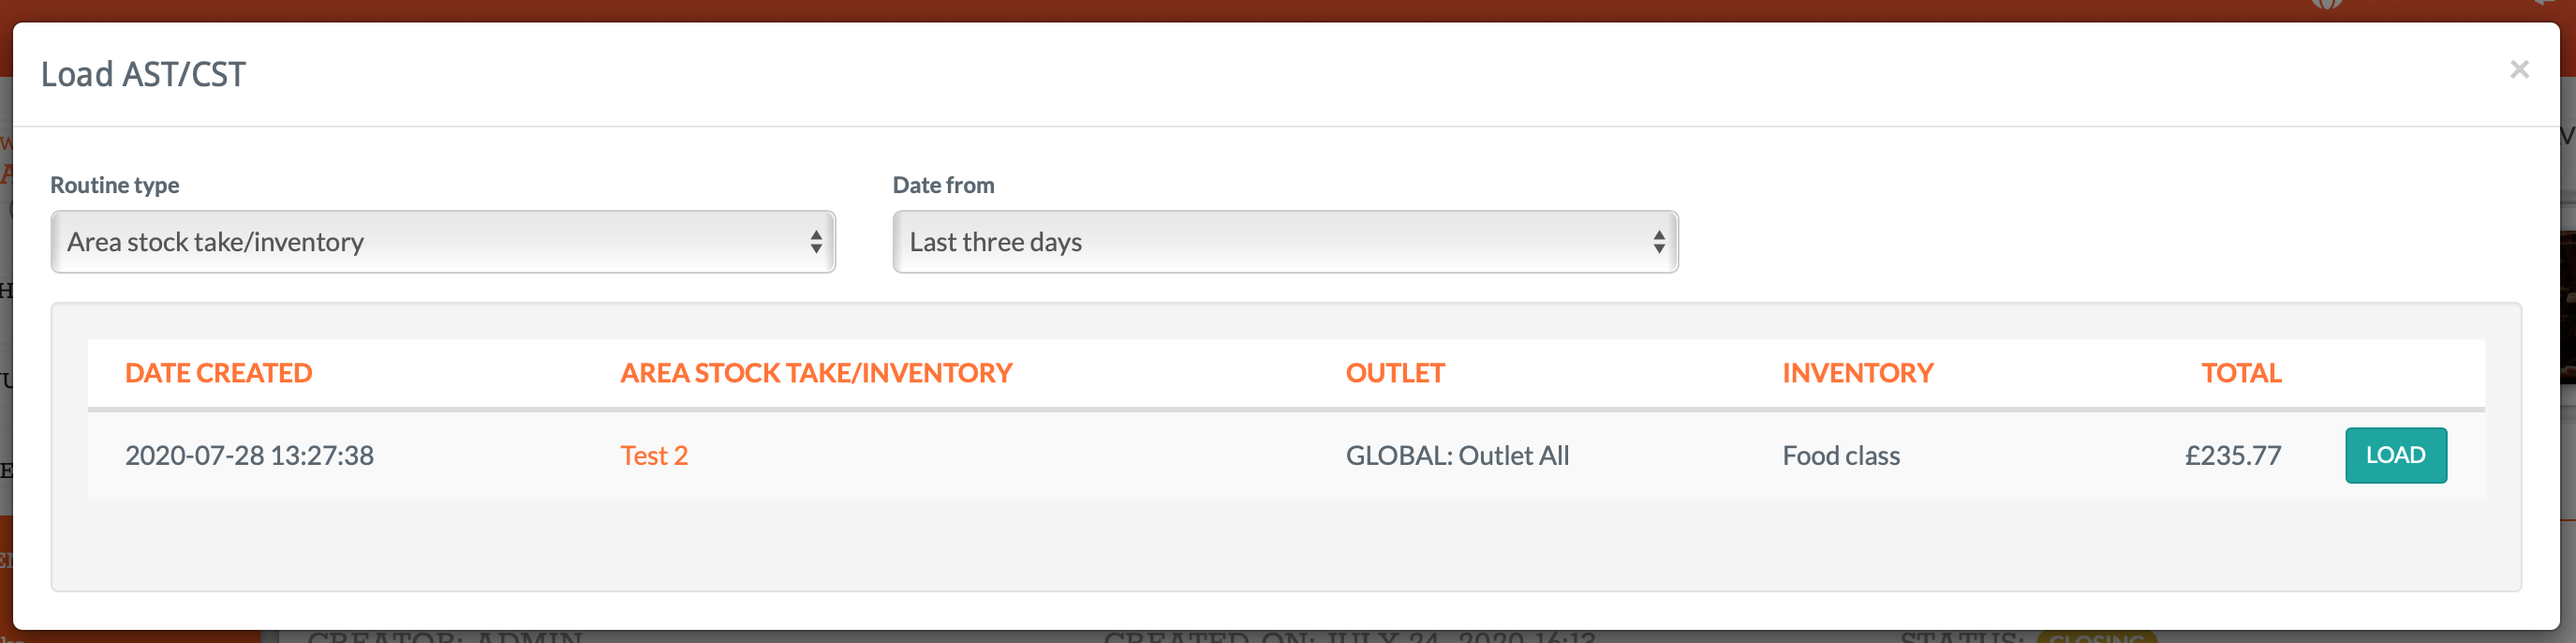
The system will populate the New Period column with your counted values.
6. Review and update counts
You’ll now see a full breakdown of products with columns for: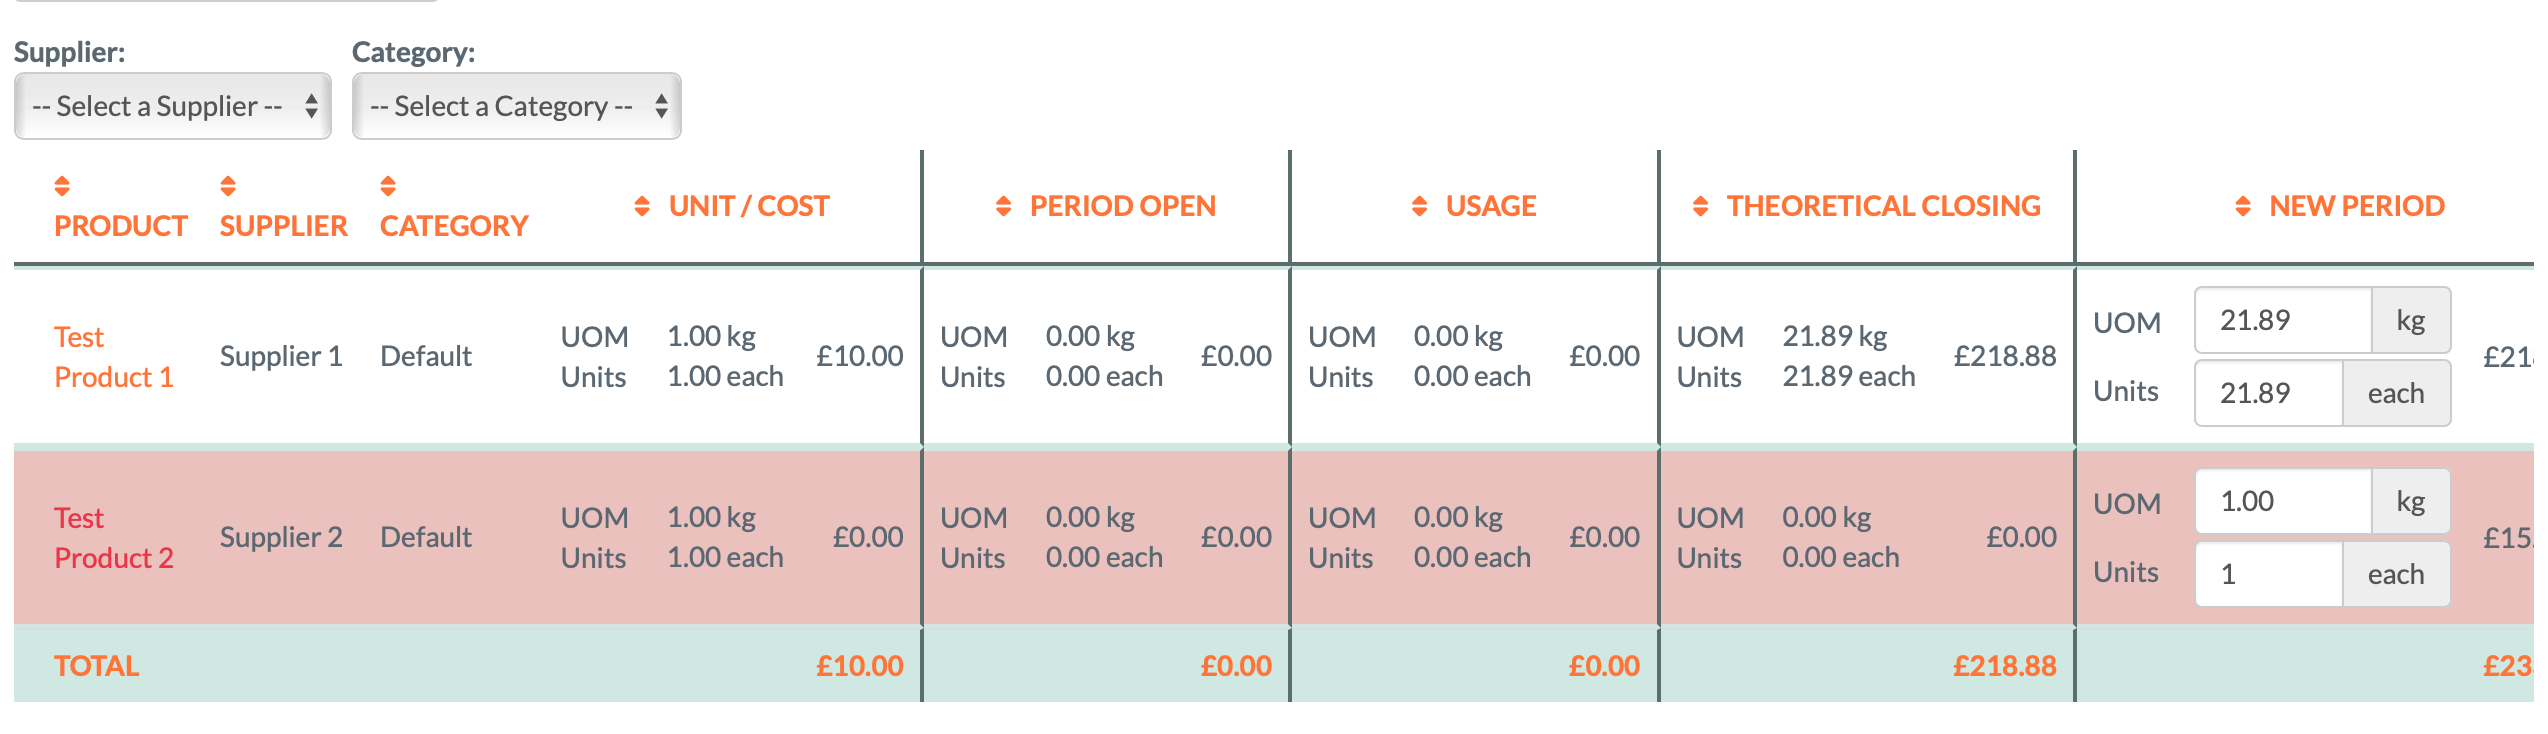
-
Period Open
- Deliveries
- Usage
- Wastage
- Transfers
-
New period values (Closing)
-
Variance
If you’ve run a recount or spotted discrepancies, manually update the New Period quantities.
7. Finalise the period
Once satisfied that all values reflect your true physical stock, click:
Actions (top or bottom of the page) > Commit Final Positions
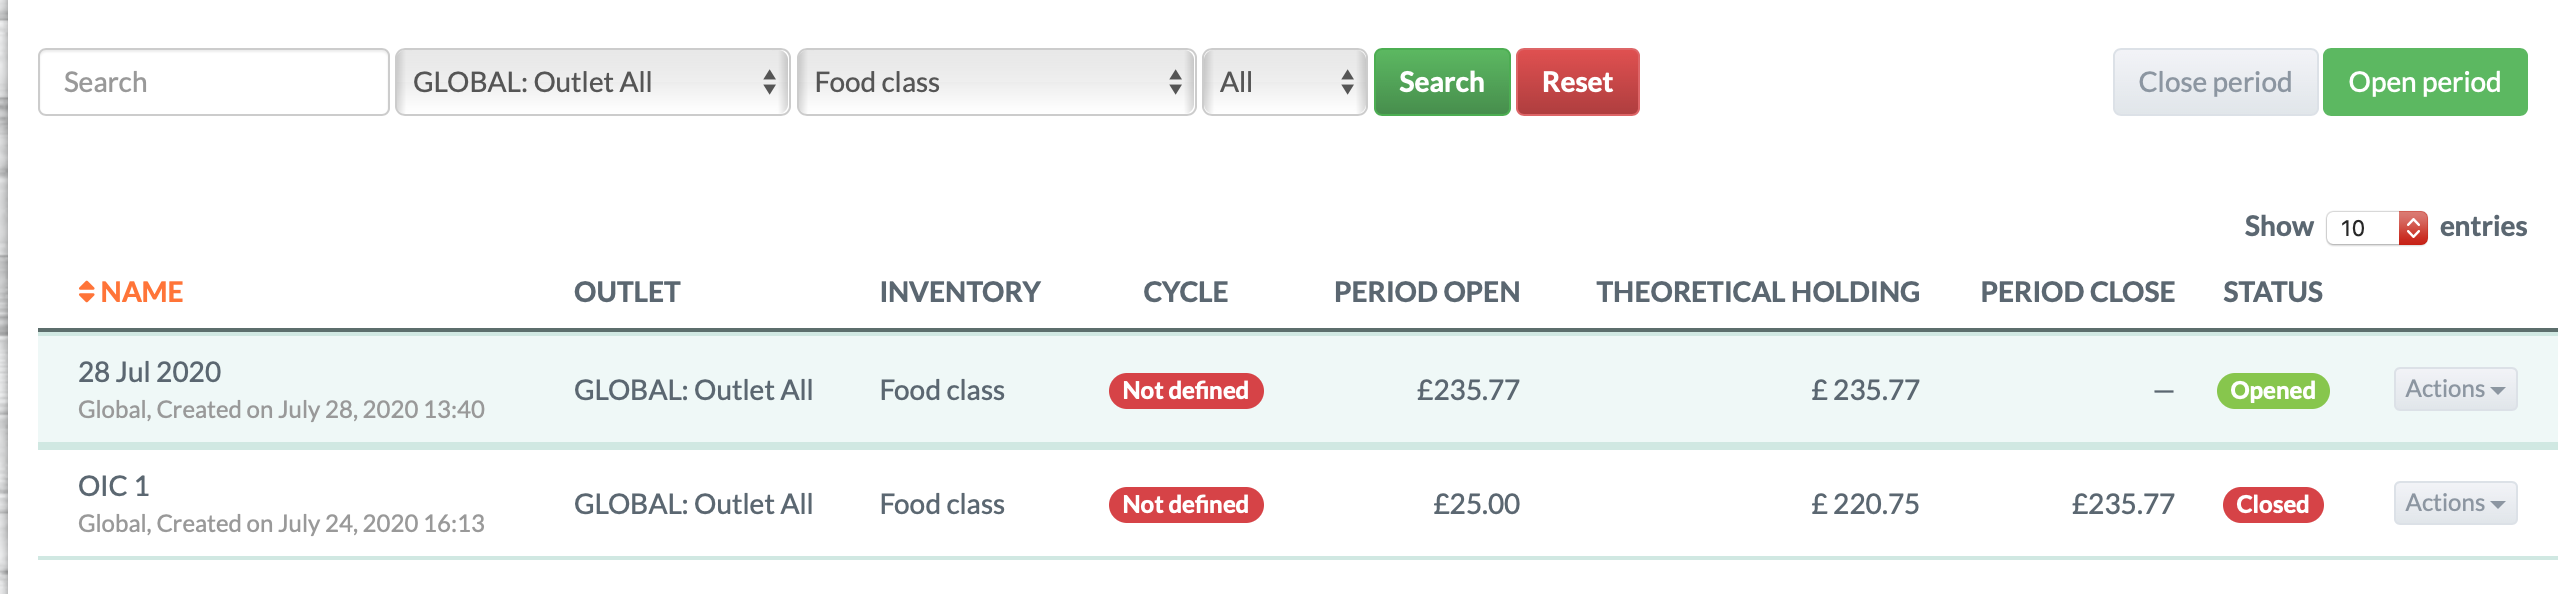
8. Confirm period status
Return to:
Inventory > Stock Takes > Outlet Inventory Count
You’ll now see:
-
The closing record is marked as Closed
-
The counted stock total has populated the opening stock for the next period
Repeat this process for each outlet or inventory class as needed.
💡 Best Practices
-
Always ensure all operational entries (deliveries, usage, sales) are in before closing
-
Use a clear naming convention for periods to avoid confusion (e.g. “July Wk 2”)
-
Review variance data in Manage Preview to catch missing counts or mapping issues
-
Use the CST (Consolidated Stock Take) when combining area stock takes
-
Close all outlets at the same time to maintain consistency in group-level reporting
❓FAQs
What if I realise a mistake after closing?
Closed periods cannot be reopened. However, corrections can be made in the next cycle, and explanatory notes should be kept.
Do I need to close every outlet manually?
Yes — each Outlet Inventory Count must be closed independently.
Can I close without using a Consolidated Stock Take?
Yes — as long as an Area Stock Take (AST) has been submitted, you can load and close using that. CSTs are only required when multiple ASTs are being combined.
🆘 Need Help?
📧 Email Support: support@kitchencut.com
📝 Submit a Ticket: Submit a ticket