
A guide for YCO 2025 contestants to show how to create subrecipes and recipes in Kitchen Cut
![]()


Before getting started, the first and most important element is understanding the difference between a ‘Recipe’ and a ‘Sub Recipe’.
Sub Recipes
These are all of your bulk recipes, yieldings, batch recipes and your basic initial Mis- enPlace that you would create before you start to create any of your main/completed dishes. Typical items you would create a sub-recipe for are: –
Bulk recipes:
- Stock, sauces & dressings
- Bulk production such as trays of lasagne, dauphinoise potatoes, roasted root vegetables, bread and butter pudding (basically any item that you would make in batches)
Yielding:
- Any yield recipes you would use often to create/add to your completed dish recipes e.g., chopped onions, chopped herbs (this is a simple yielding process you do once, which makes it easier when writing other sub recipes & recipes – you can add yielding sub-recipes to other sub-recipe recipes)
- Fish, poultry and meat yielding – again, this can be done once and used as a guide for costing and weight per portion.
NB: Where possible always use weights and measures for sub recipes (kg, g, litre, ml, pint, gallon, quart etc) as this gives you better flexibility later on when using this item in your completed dish recipes. If it makes sense to use “each” or “portion” then you can use it (e.g crème brulee- where it is unlikely you would use less than a portion BUT do try to use “each/portion” sparingly).
Recipes
Quite simply these are your “completed dishes” which have been pulled together from a series of sub recipes and products.
For example, if we take a dish such as roast rump of lamb served with dauphinoise potatoes, roasted root vegetables, buttered savoy cabbage and a red wine and rosemary jus you would build up the recipe for this dish as follows:
- Dauphinoise potatoes – would have been created as a bulk sub recipe
- Roasted root vegetables – would have been created as a bulk sub recipe
- Buttered savoy cabbage – would have been created as a bulk sub recipe
- Red wine and rosemary jus – would have been created as a bulk sub recipe
- Lamb Rump – likely to be a single product from your butcher, rather than an already created sub-recipe
Creating sub recipes
The quickest way to create sub recipes is from your DASHBOARD
-
Click on “CREATE SUB RECIPE”
OR
-
On the navigation on the left-hand side, select Menu Costing > Sub recipes > Add new


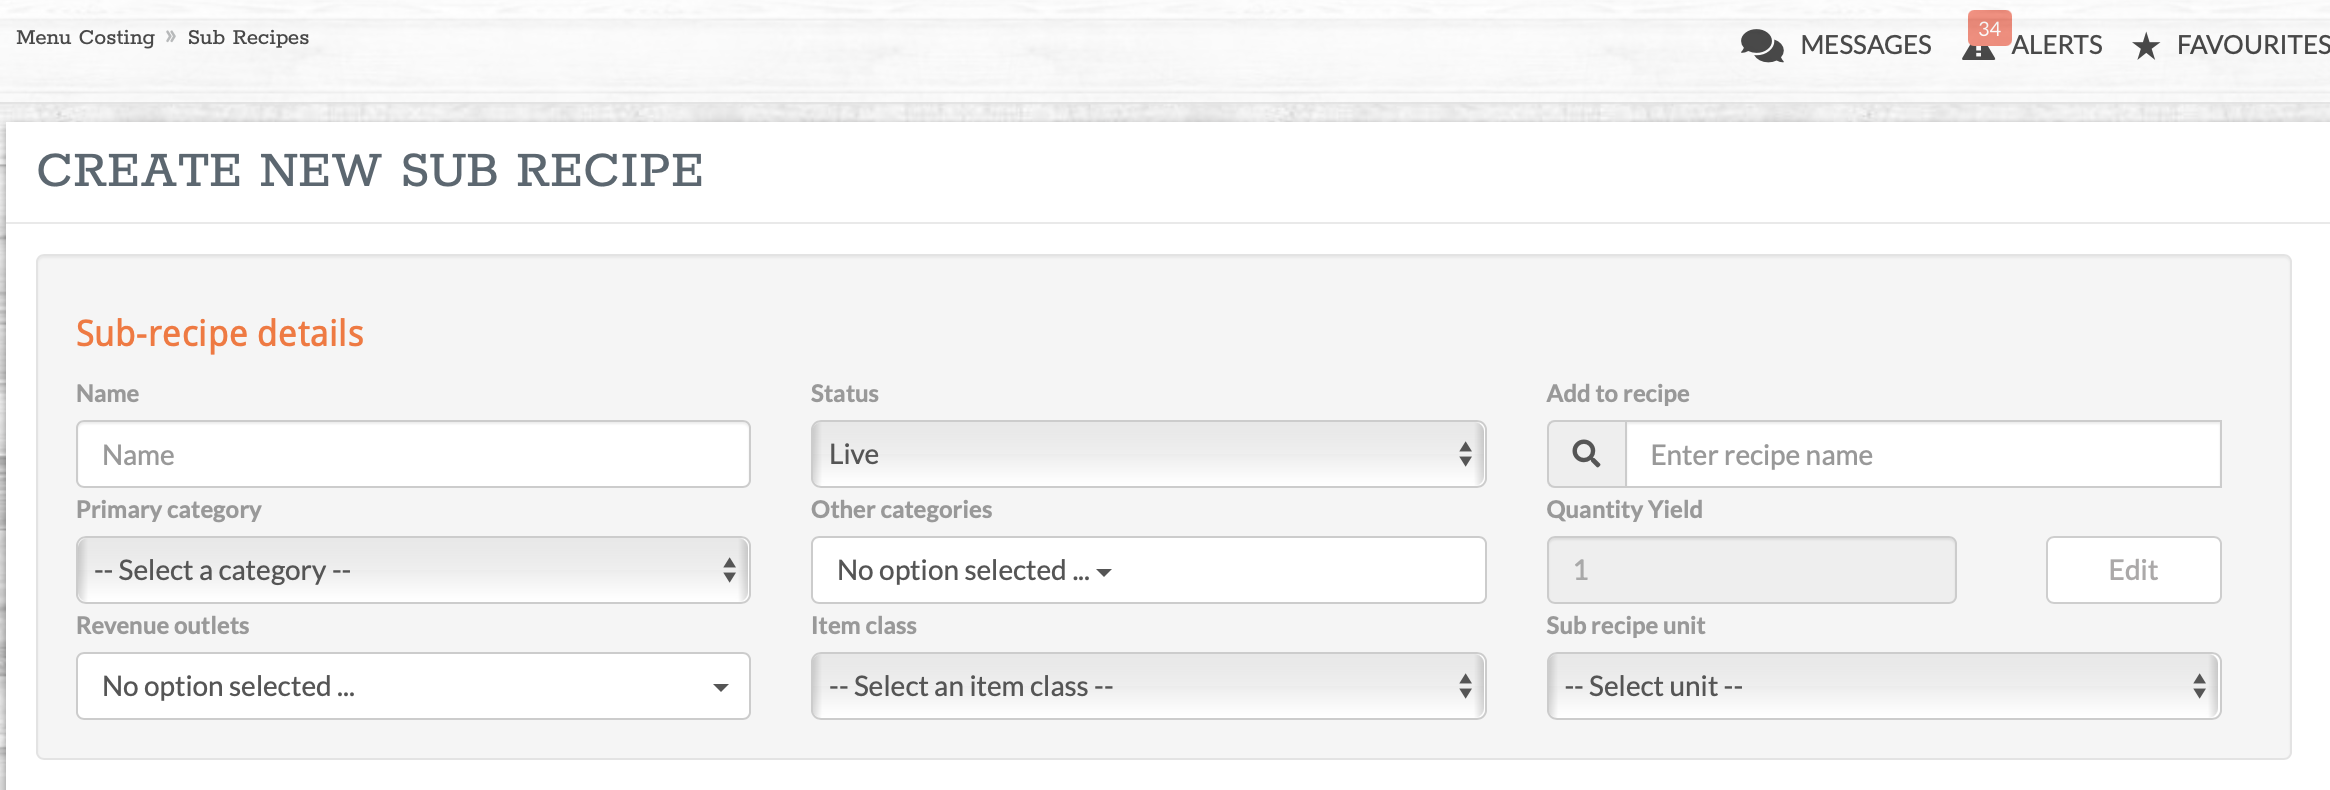
This will take you through to the “CREATE NEW SUB RECIPE” page
Get started by inputting your sub recipe details:
-
Name - give your sub recipe a name ( e.g. tomato sauce)
- Status - there are 3 options here: Live / Development / Testing. The default is ‘live’ (the development and testing status’ are used if you are testing/making changes to the recipe)
- Add to menu - Ignore this (this is an advanced setting)
-
Primary Category - at Kitchen CUT we have populated this section with over
30 categories (click to select from the drop-down list)
-
Other Category - you add extra category tags to your recipe if it sits in multiple different categories
-
Quantity Yield - Click “EDIT” and enter how much this sub recipe produces (e.g.
1 / 750 / 345 etc) then click “Save Yield”. Ignore “lock down quantities” at this
stage.
-
Sub Recipe unit - This is a weight or volume measurement which relates to the
quantity yield (if your sub recipe produced 750ml you would put 750 in
“Quantity Yield” and then choose milliliter in “Sub recipe unit”
-
Revenue outlets - Select “Global”
-
Item class - Select Food
Products - this is where you can start adding ingredients to your subrecipe
Mock/dummy supplier data has been imported into the system already. Simply start to type the product that you are looking for, and the system will search for your product if available. The more characters you type, the more specific the search will be.
NB: if you cannot find the product you want, you can add to “Extras” or add to
product list (see notes/guide on adding products).
Once you have identified the product you are looking for, click on the product/supplier combination that you want to use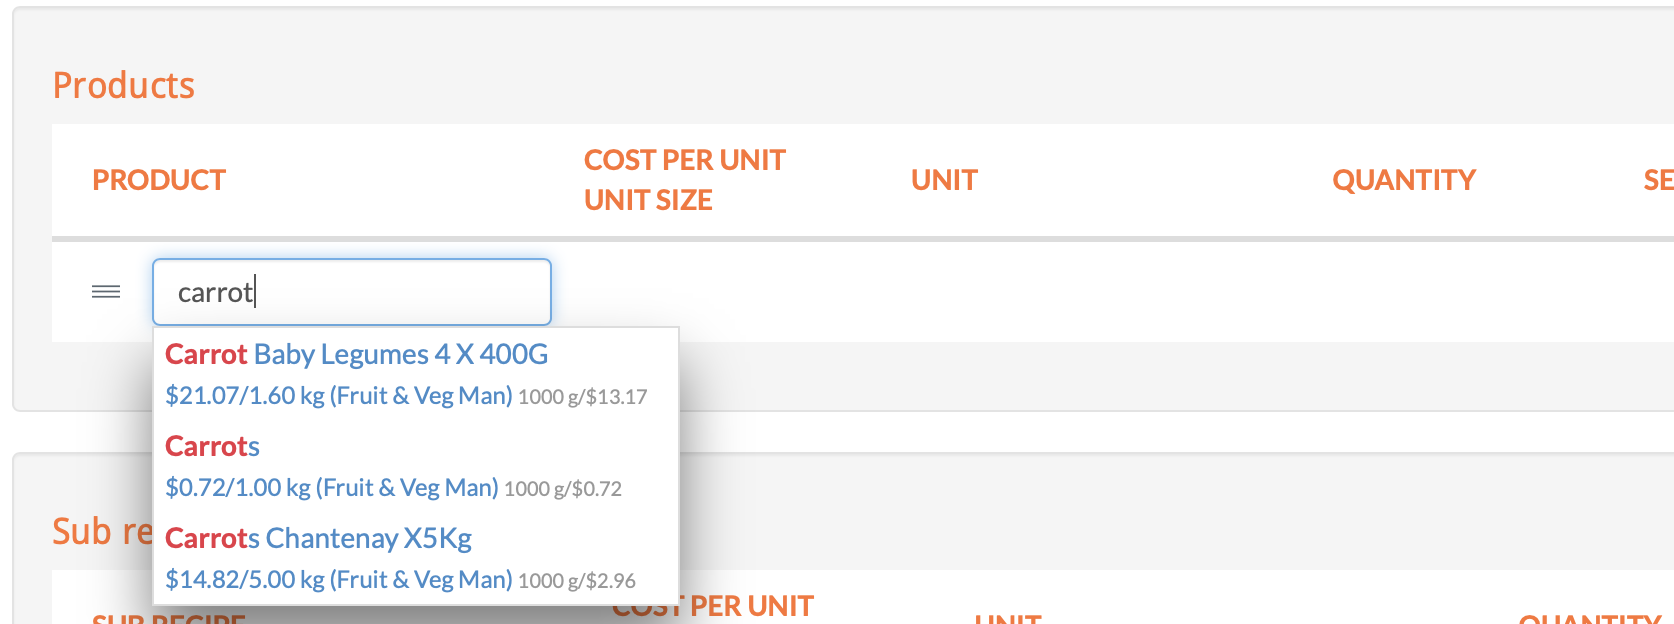
The system will then drop that product into your sub recipe and by choosing the quantity and unit (you can change the unit if necessary) the system will calculate the recipe cost
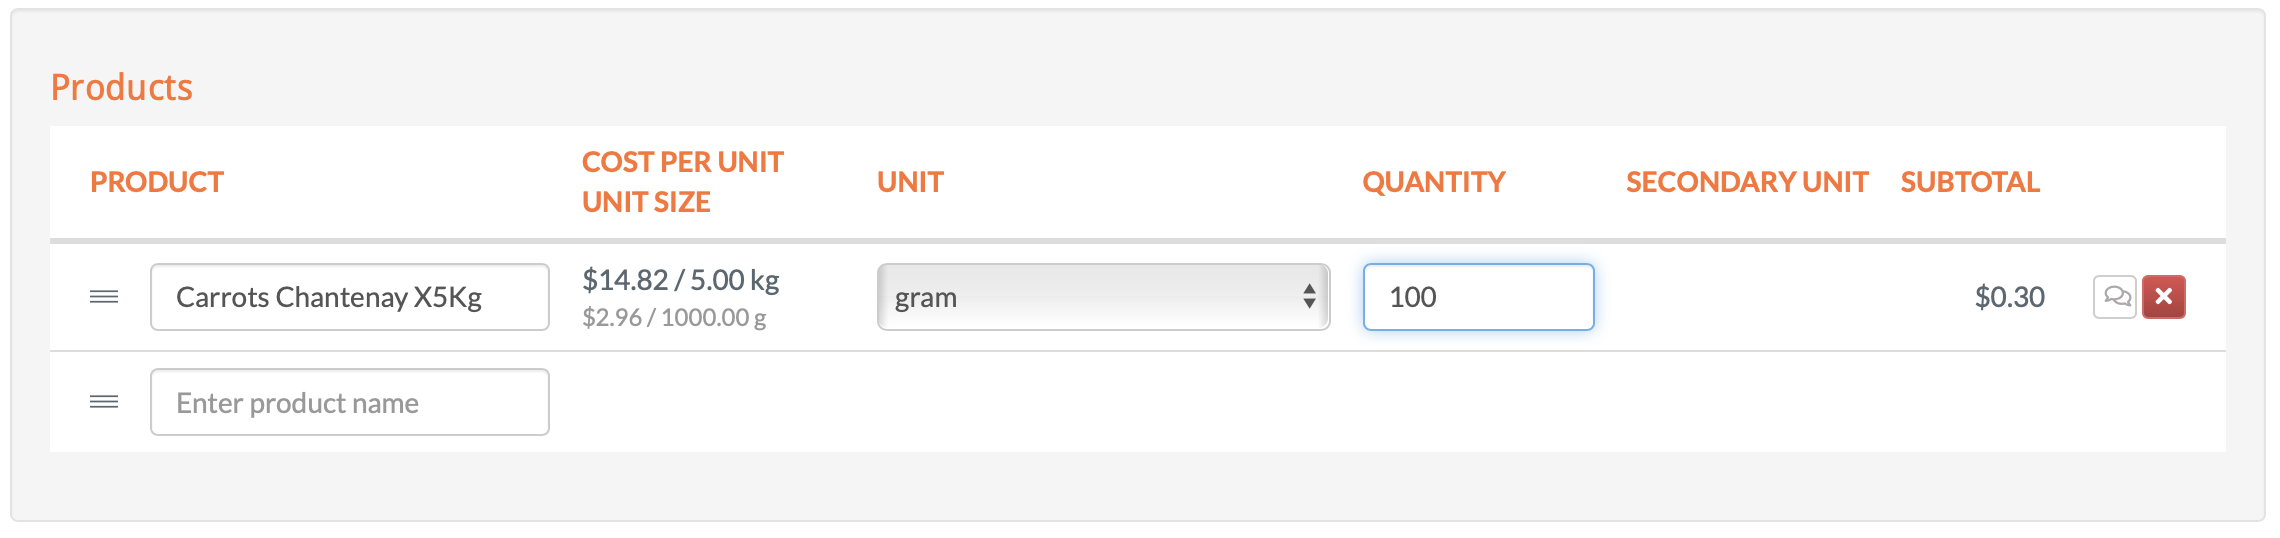
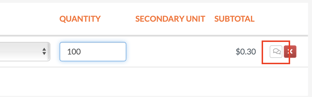
You also have the option to enter Chef/Operator/Judge’s notes into the system, which will appear under the ingredients when the sub recipe is saved. If you click on the speech bubble on the right-hand side, you can add your comment and then save
You can then repeat the above steps to add as many ingredients as required.
You can also search and add previous/other sub recipes into this sub-recipe under “sub recipe” in the same way as you searched for your products - see screenshot below.
“EXTRAS” would normally only be used for water as everything else should be either an ingredient or a sub recipe - OR if you cannot find the product you are looking for you can manually add it in here. 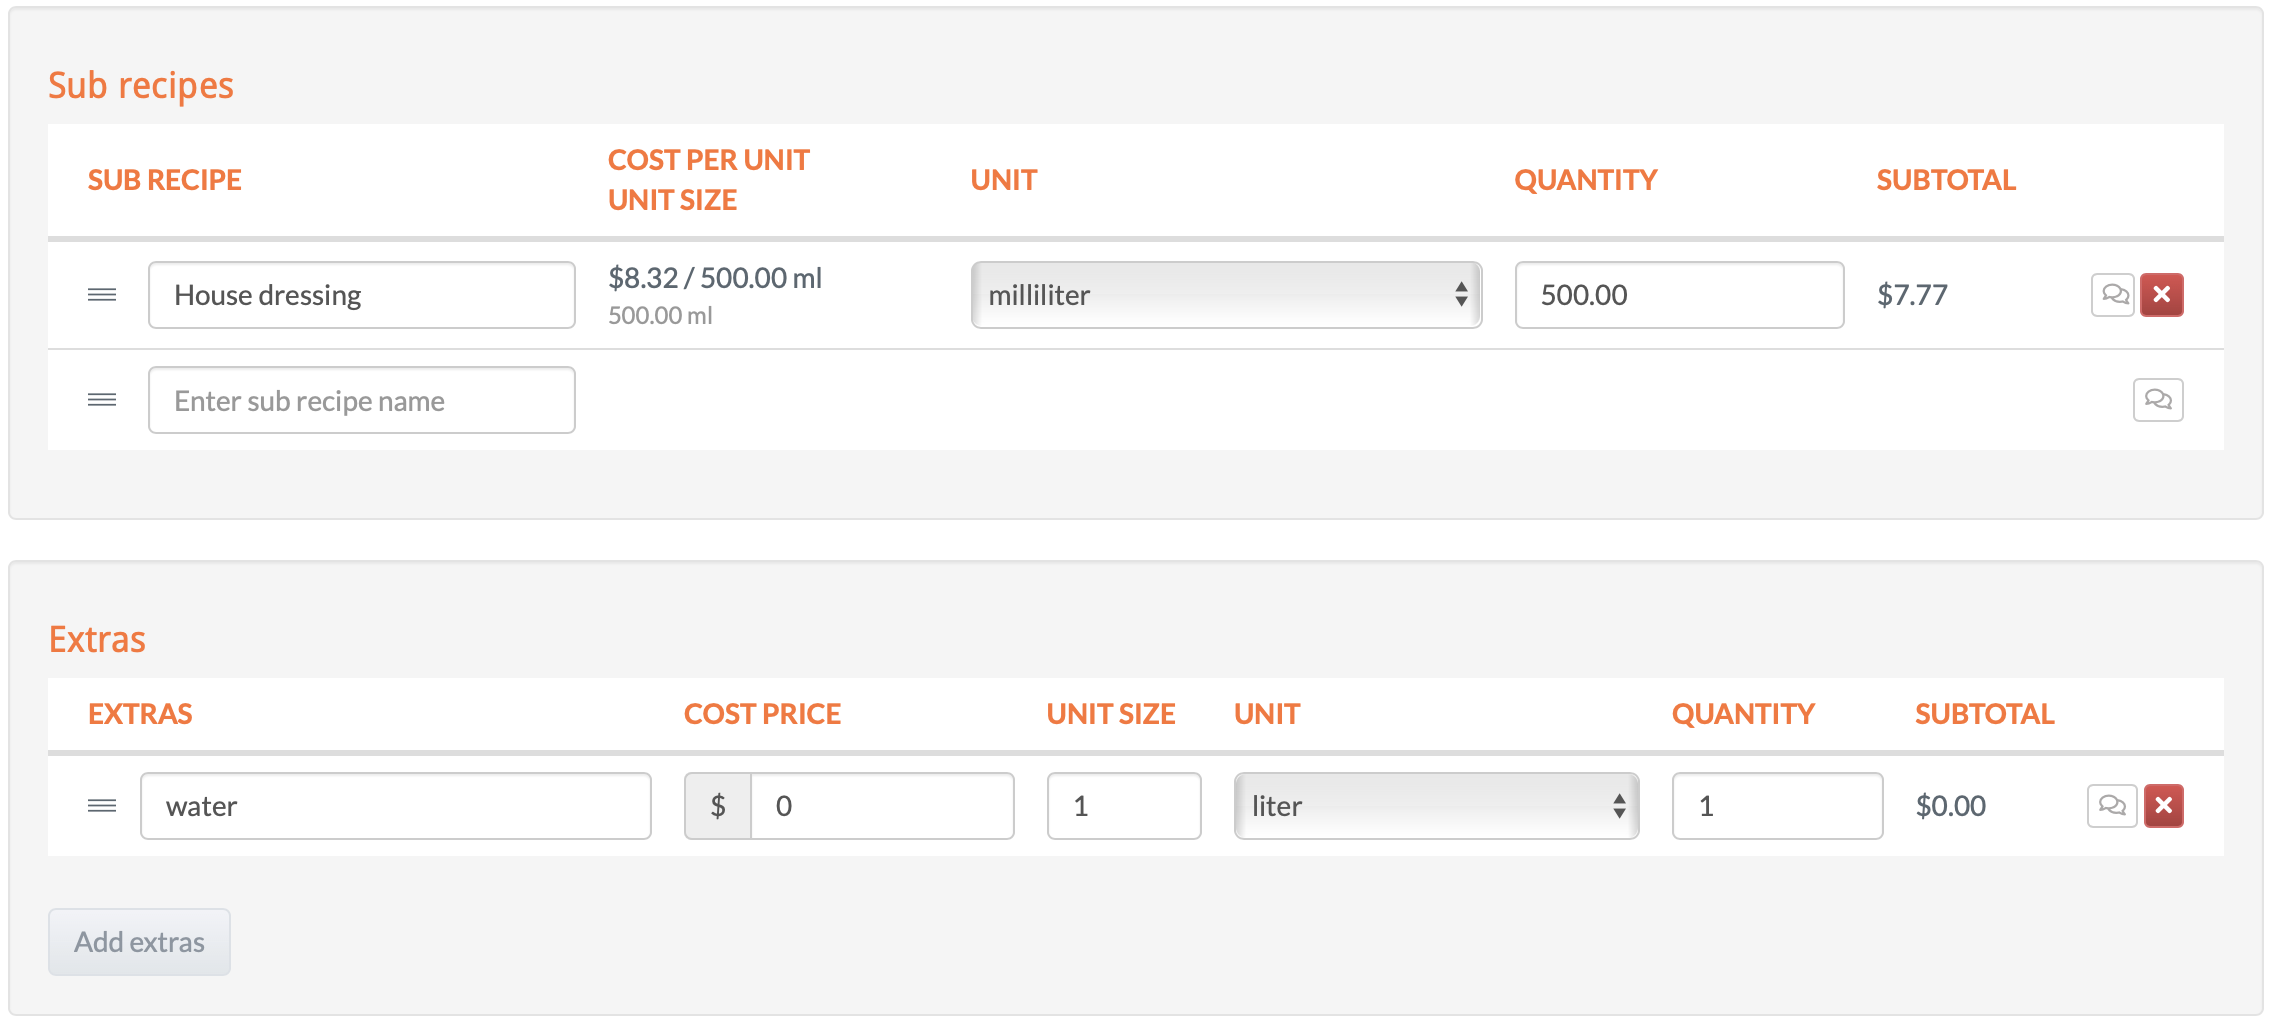
At this point you will have all of the products and sub recipes sitting within your sub recipe with an associated cost and suggested selling price details.
Costings
This year you will be judged on the costings and GP calculations. The system does suggest a selling price for you, which you can choose to use or add something similar.
As you can see the system calculates the Cost of sales ( Food cost) and GP% and GP $:
Method
It is very important that you write methods with all sub recipes and recipes.
When writing your method, if you want to adjust the order of the products in the sub recipe to reflect the method process then you can do this by clicking and dragging each product into the desired order by clicking on the 3 bars next to the product: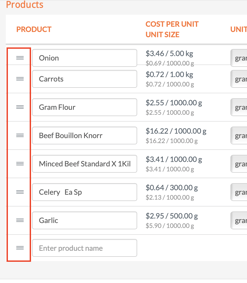
Service notes
This is typically used for completed dish recipes to indicate any specific information about the dish, and is unlikely to be required on subrecipes. Examples of this include but are not restricted to:
-Provenance/origin of products
-Details of products
-Drink suggestions/accompaniments for the dish
-Cutlery requirements
-Service requirements (e.g. finger bowls, lobster picks)
-Any other recipe appropriate notes or comments you want to share with the judges
Allergens
All dummy products have been tagged with the appropriate allergens - these will auto-populate across all your sub recipes and recipes as well as pulling through from one sub recipe to the next automatically (e.g. if a sub-recipe is used to create a further sub-recipe).
You can also manually tick allergens to add them to products and recipes – again this will auto-update your sub-recipes and recipes so that they are reflecting the correct allergen information.
Adding photographs
You can quickly and easily add as many photograhs as you like to a sub-recipe or recipe, however the size limit is 10Mb per photo. Photos can be used to help demonstrate the different steps of a method, regulate standards and ensure quality. 
Ideally photographs should to be taken landscape to enhance the viewing experience
There are 2 options:
Option 1: Click ‘browse’ and find the relevant photograph on the computer you
are working on
Option 2: Click ‘browse’ when working on a device that has a camera (e.g. smart
phone/tablet) - Kitchen CUT will recognise that your device has a camera and will offer you the option to take a photograph and load straight into the system or pick from the photos stored within your device

Adding Video
Video can be added to the recipe which can be from your own personal Vimeo or YouTube account – you can copy and paste the URL link into the relevant box
NB: on You tube copy link after the “=” sign https://www.youtube.com/watch?v=hwJMe7Zj9p4
You can also copy and paste YouTube and Vimeo links that are available for the general public and use these within your recipes e.g. “how to” videos for cooking specific ingredients
NB: there is no need to add videos if you don’t want to.
To Save: Just click “Create”